
Background
We’ve had a lot of questions about the funny-looking post on the front of our vehicles on the trail, and a few from folks online ask about our camera setup. This post captures what we’ve found interesting or useful about how we capture, edit, and share video of our rides.
First, here’s why we go to all this “trouble.” We really enjoy these rides, love sharing our experiences, and want something we can look back on later. We also enjoy the process of creating the videos; it’s a hobby in its own right. It takes time and money, and there is a learning curve, so if you’re getting into this for the first time, be ready to invest both, have patience, and enjoy the process of creating and sharing.
We are still learning, too. Using a “360” camera and filming off-road rides is relatively new to us. As we’ve picked up new tricks, two things have happened. First, the quality of the videos continues to improve. Second, we are getting faster at assembling and sharing them. Editing is the most time-consuming part, but we’ve learned to trade a bit of customization for techniques that speed up the workflow. There’s some trade space here: sometimes we put videos together quickly, and sometimes we spend more time.
By sharing our experiences with hardware, software, editing, and anything else related to off-road video, we hope others can benefit from what we’ve learned, just as we’ve benefited from learning from others.
Camera details
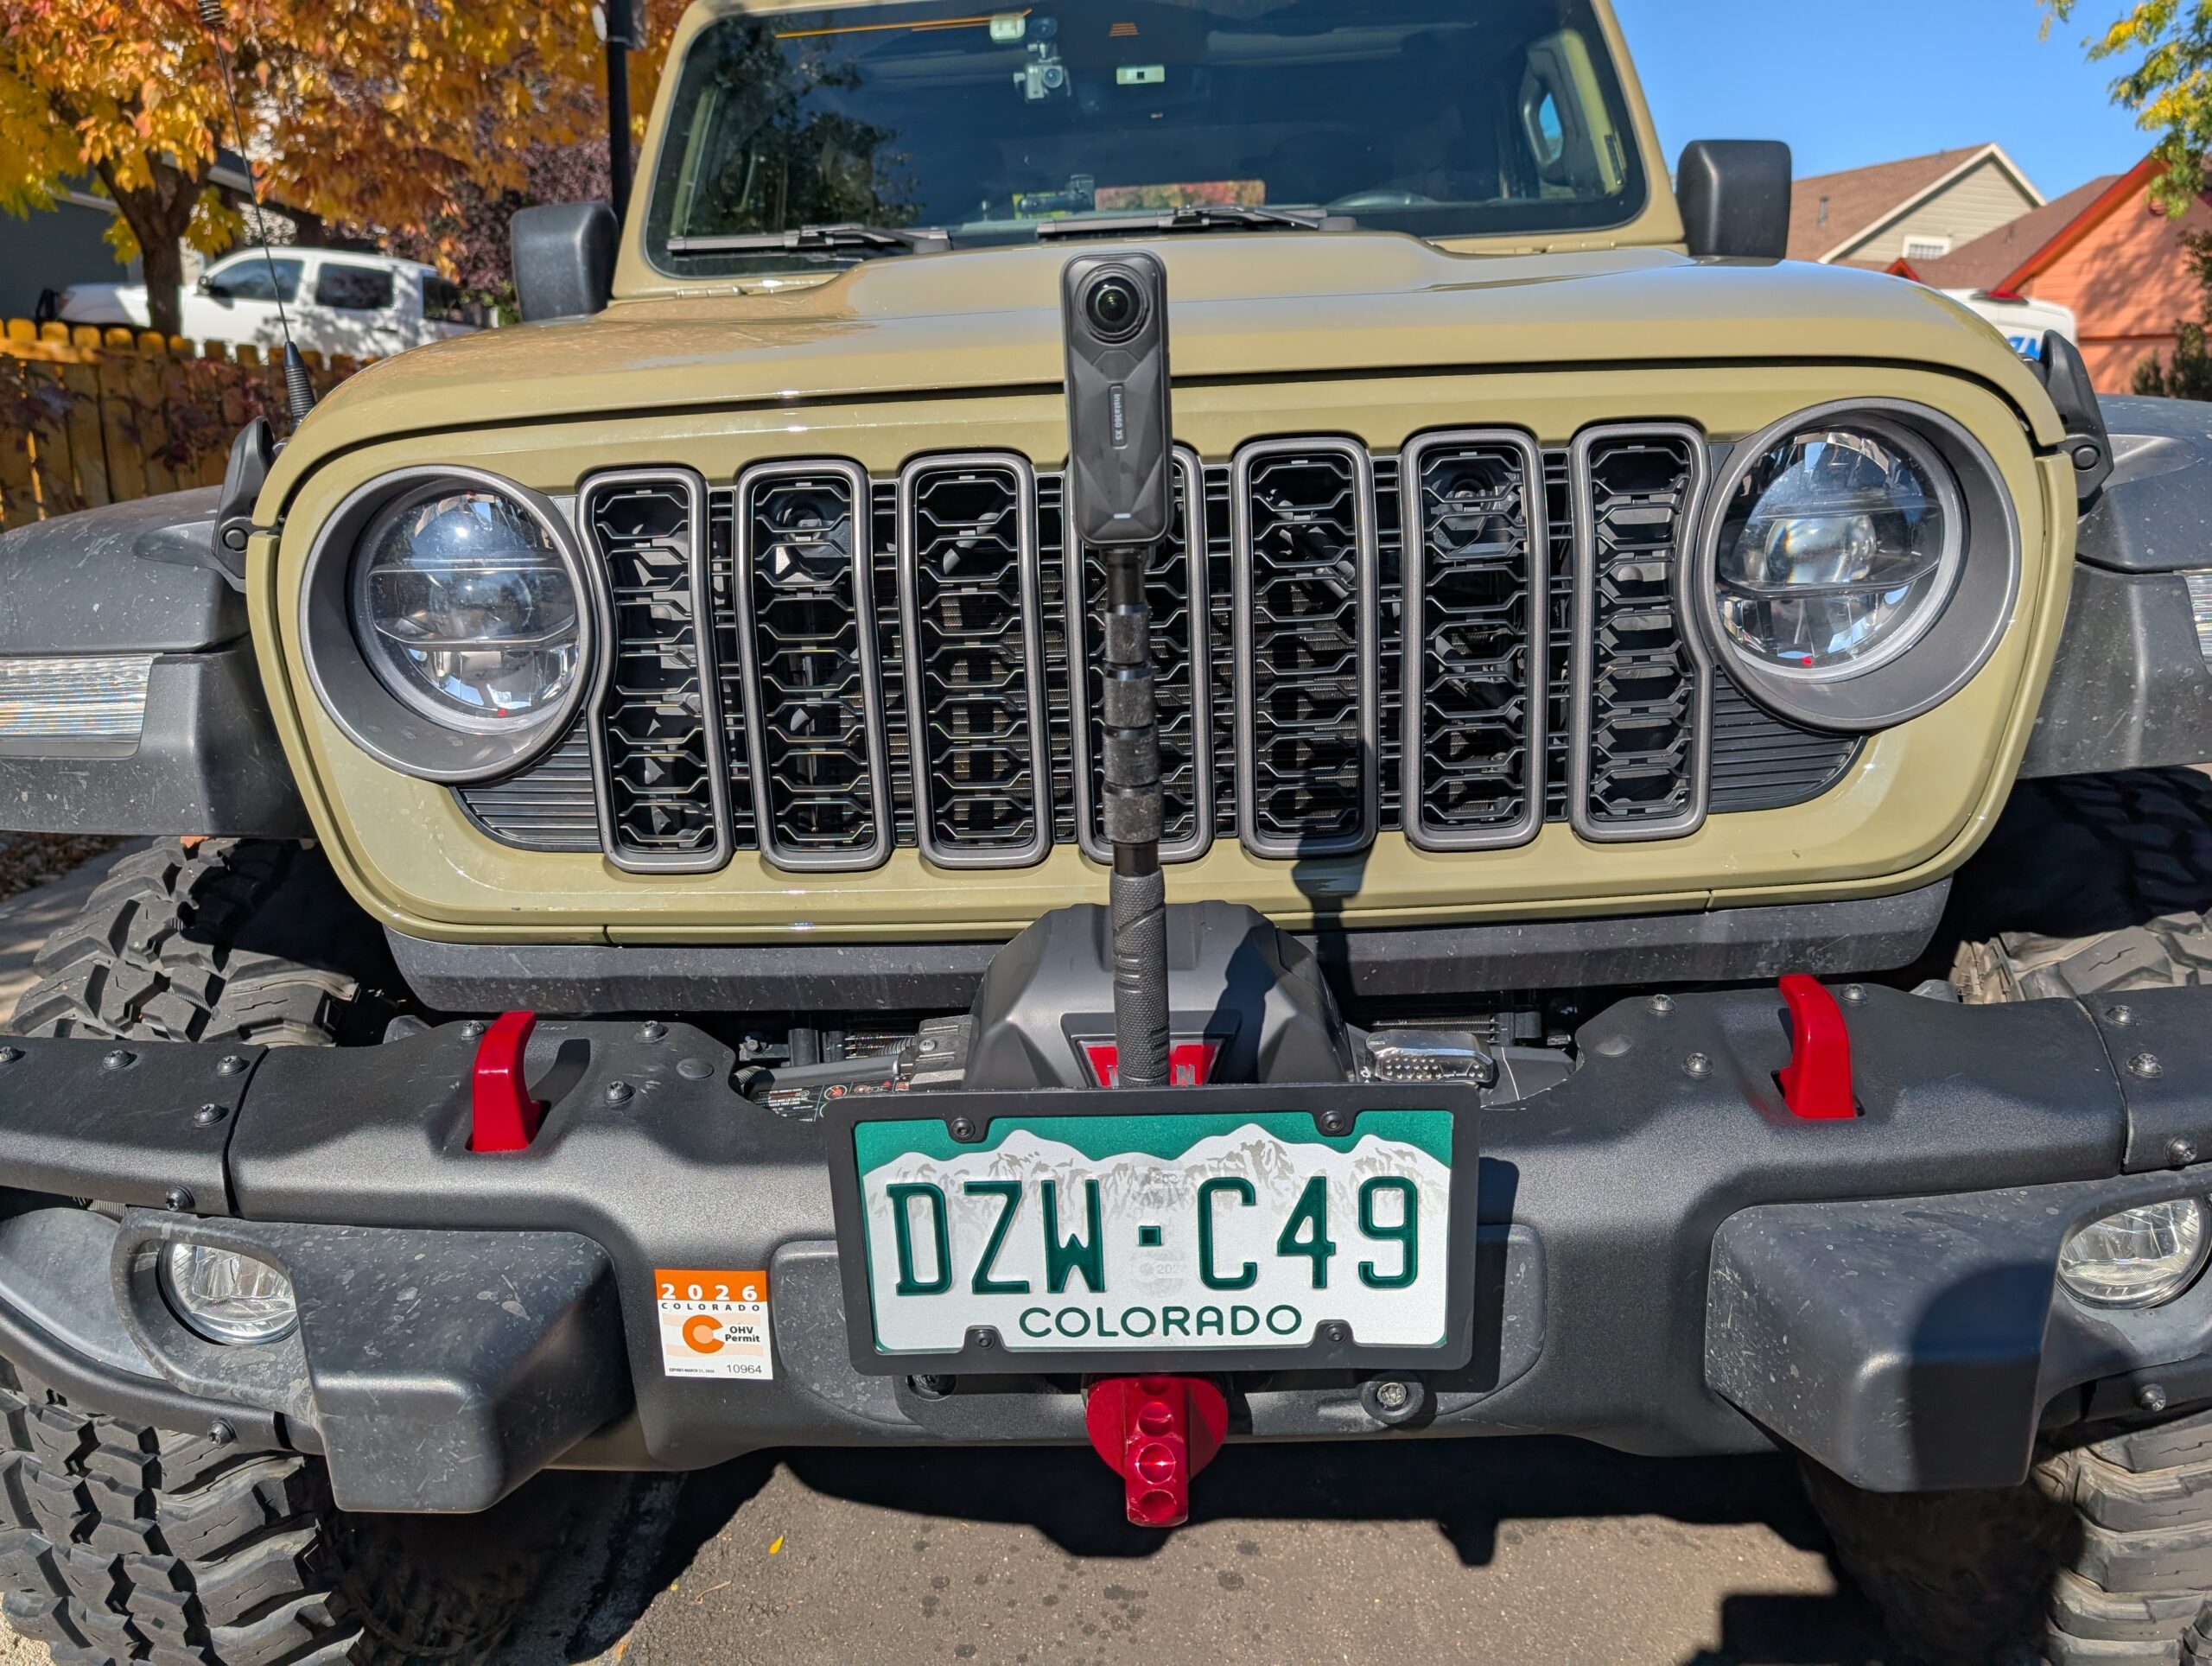
We’re shooting with an Insta360 X5 mounted on the front of our vehicles. The big advantage is 360-degree capture at high resolution, so we can decide later what the viewer looks at. We typically record at 8K, 30 frames per second. If we need more slow motion, we can bump to 60 fps at a lower resolution.
Stabilization is outstanding. Between the hardware and Insta360’s software, it smooths out bumpiness from off-road driving and stitches the dual lenses seamlessly. Because the camera sits on a post, the area directly beneath it is stitched so the pole disappears, which makes it look like the camera is floating out in front of the Jeep.
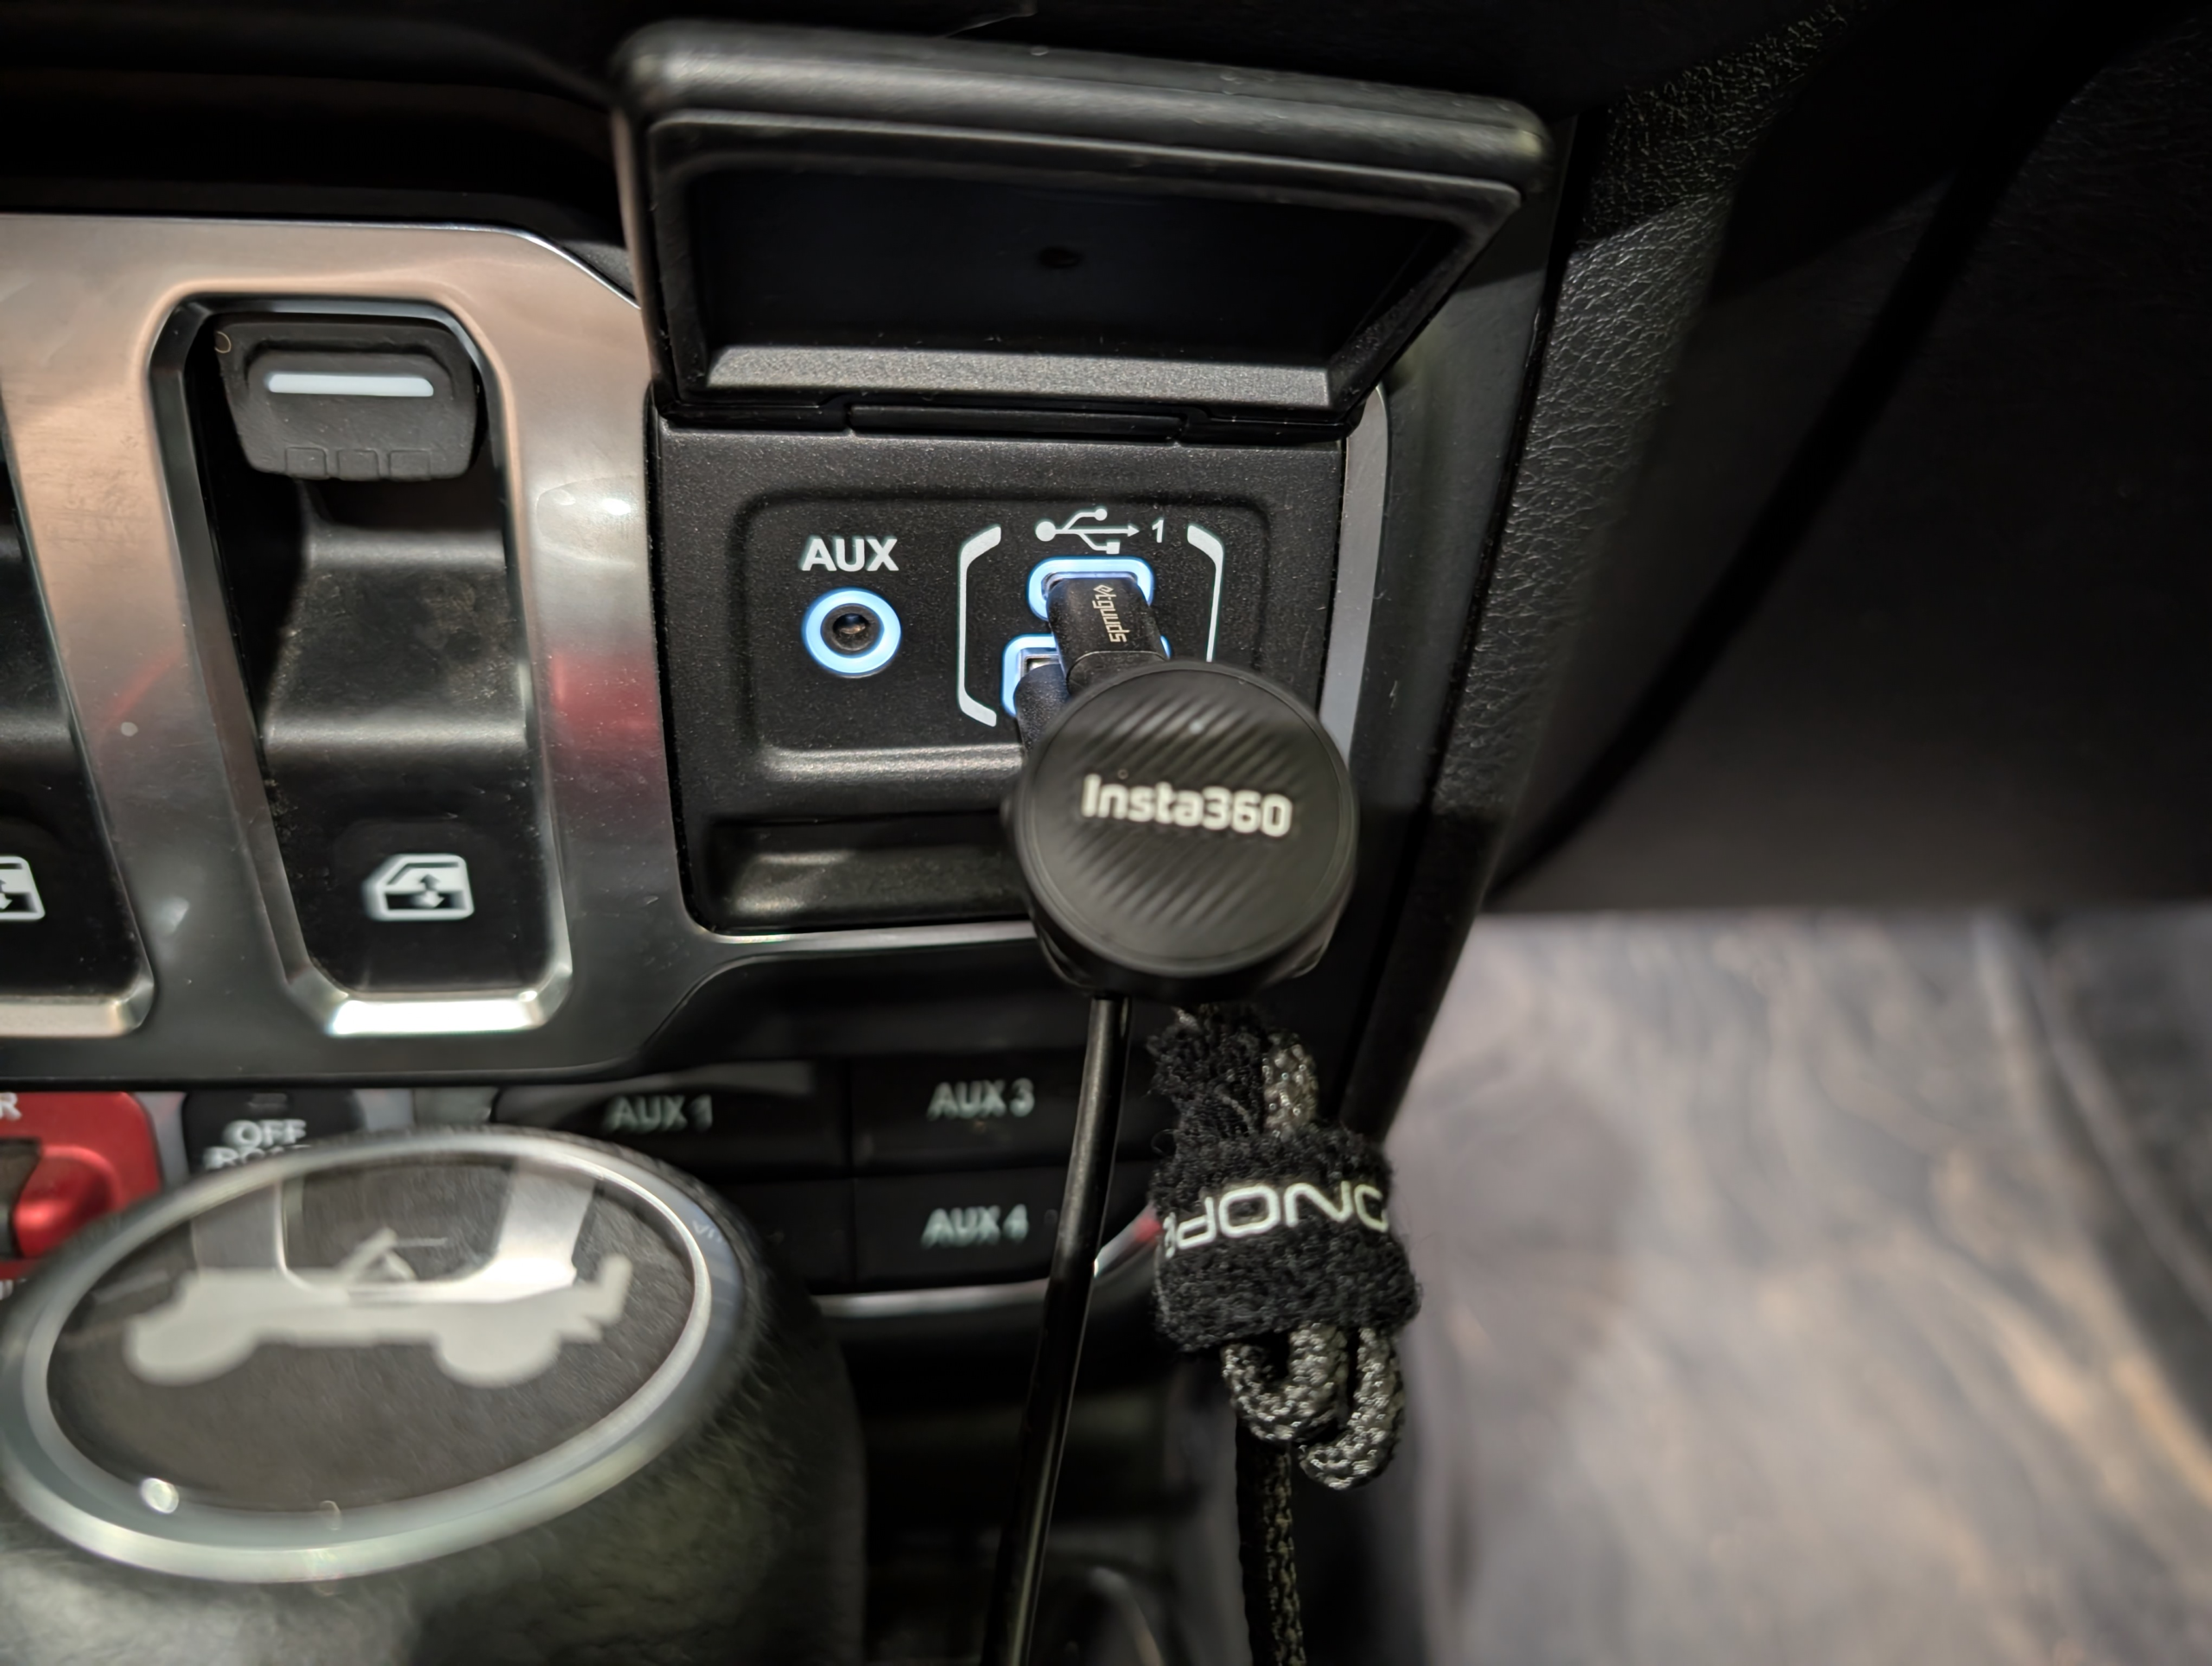
It’s easy to use. Once you know the buttons, it’s a couple of taps to start and stop. We can also start and stop it from inside the vehicle using a remote Insta360 Air Mic. We run a 1 TB microSD card so we can record multiple trail days without swapping. We also carry extra batteries, a charger, and spare SD cards. After a trip, we offload the card to a fast internal NVMe drive, edit what we want to keep, and later delete older raw footage to free up space. The faster drive noticeably improves workflow: imports happen quicker, timeline scrubbing is smoother (especially with 8K 360 footage), proxy generation and previews start sooner, and renders/export queues finish faster.
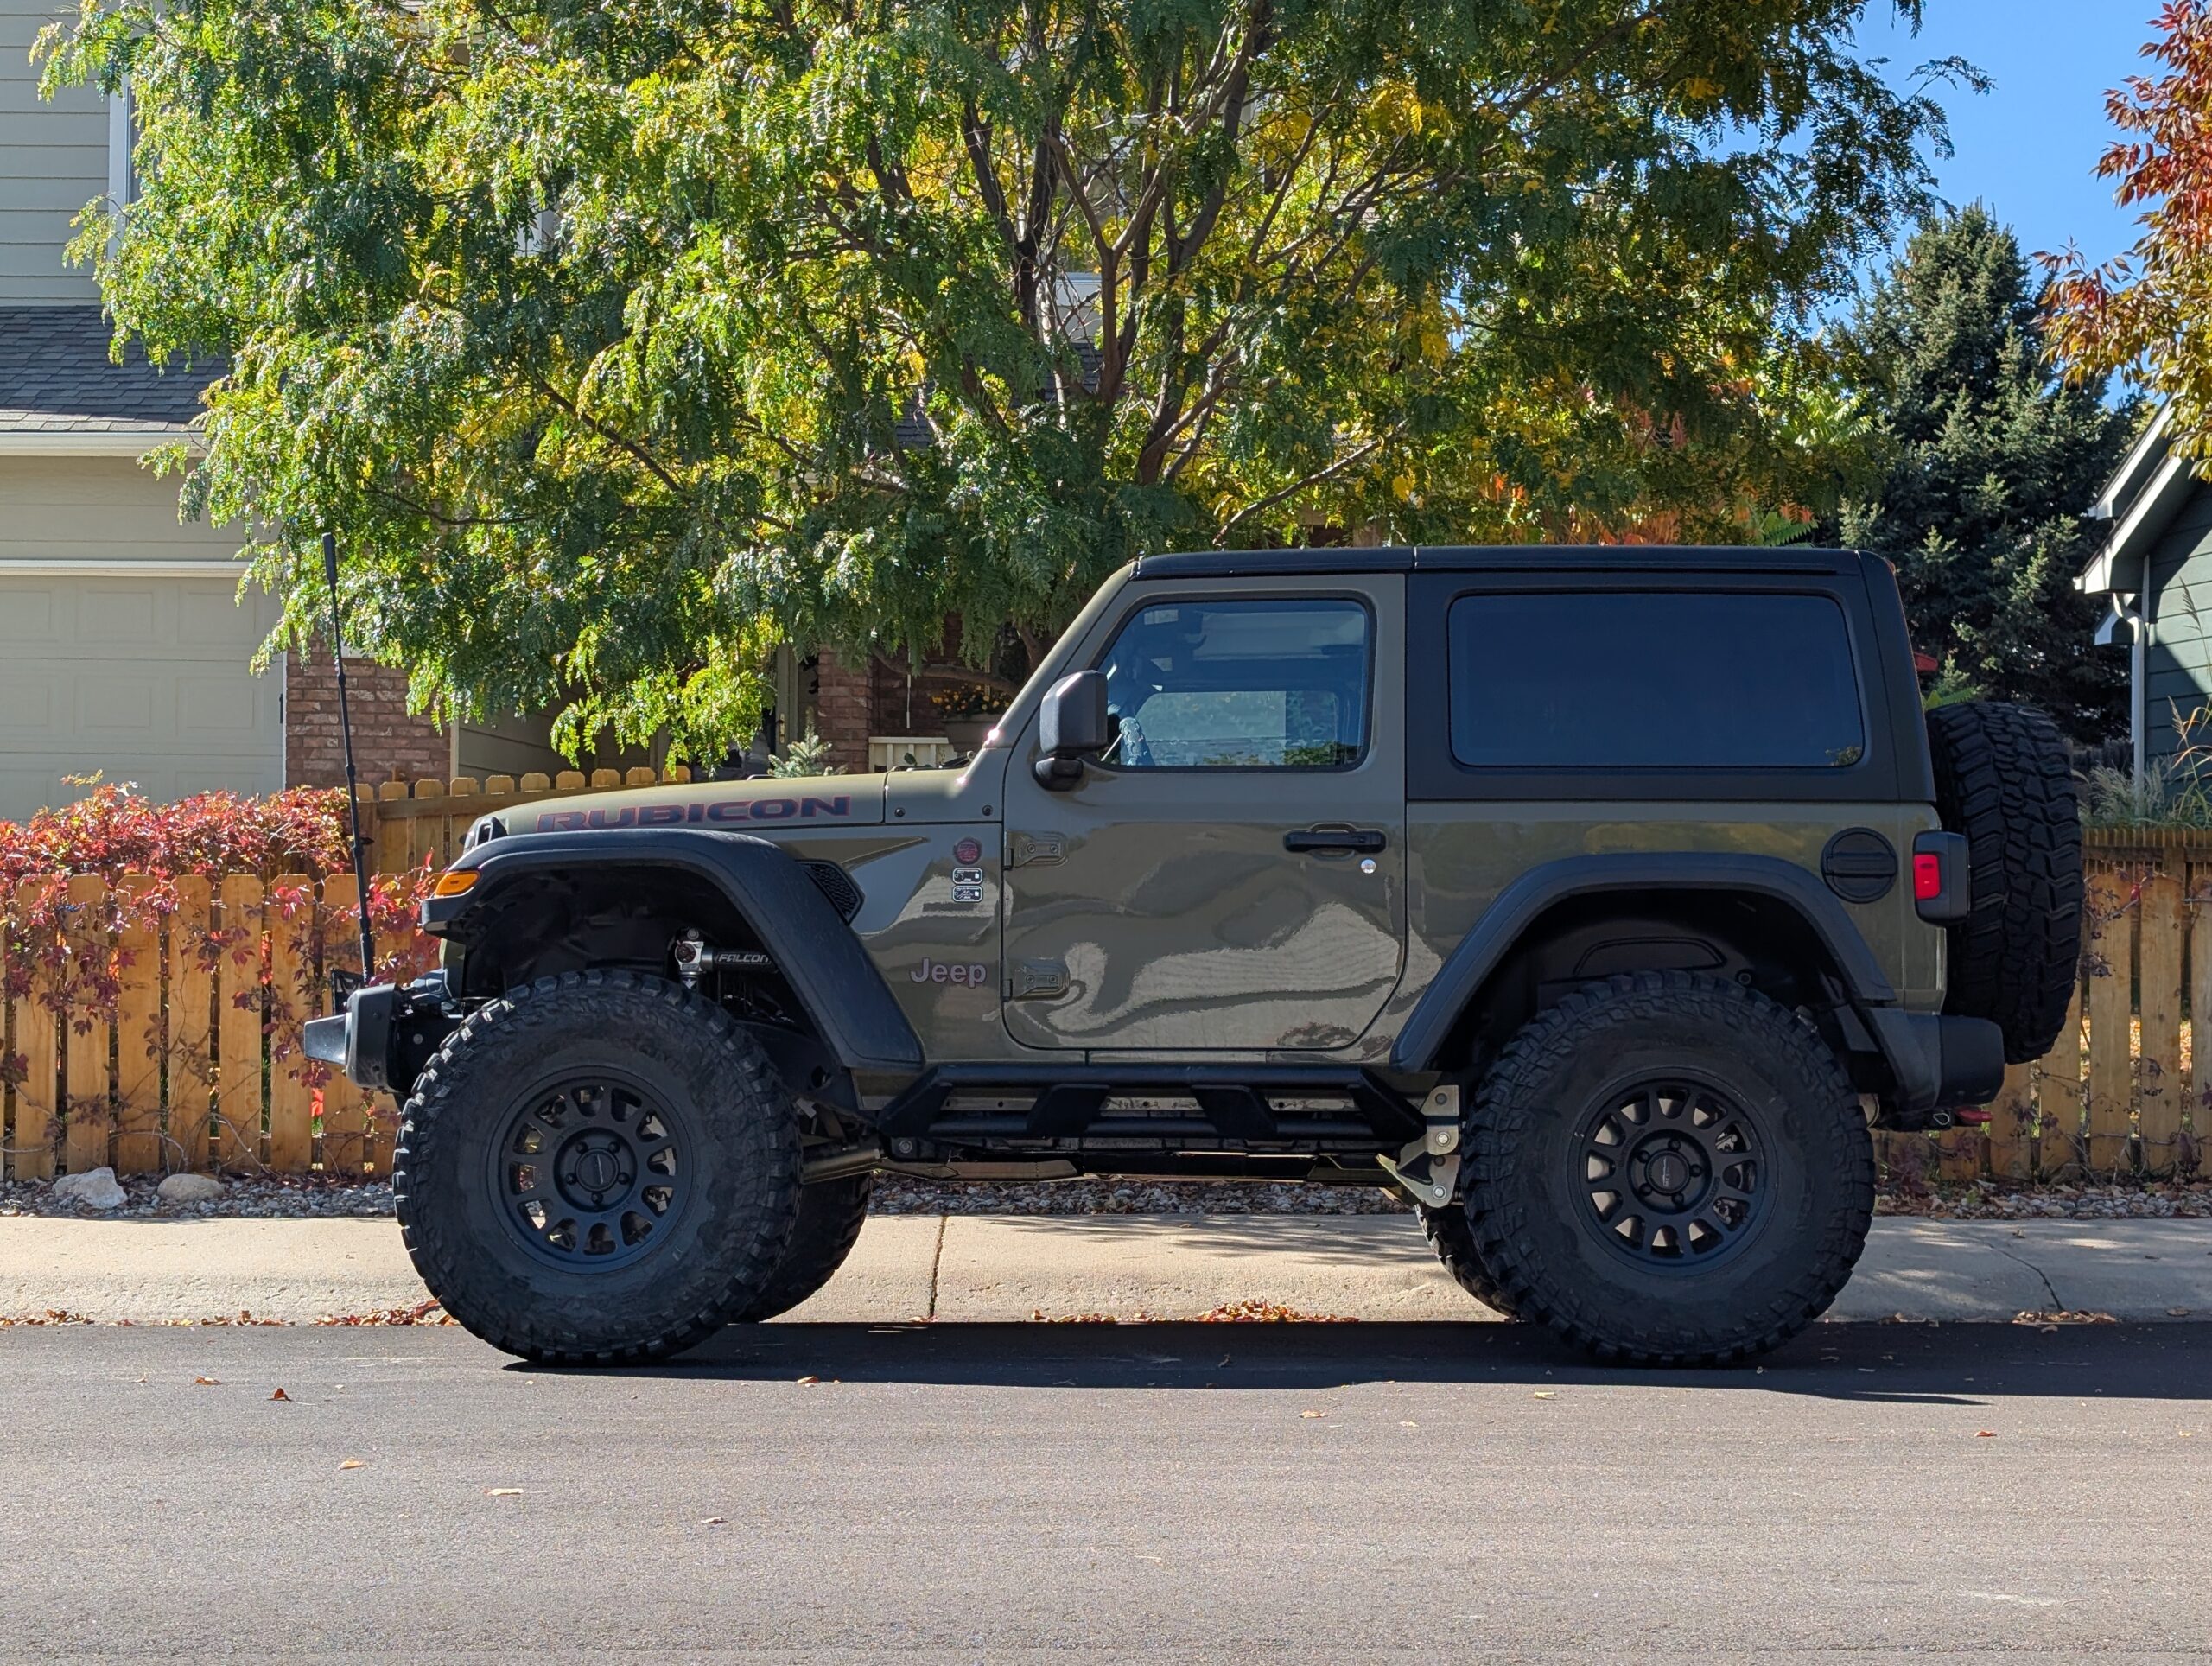
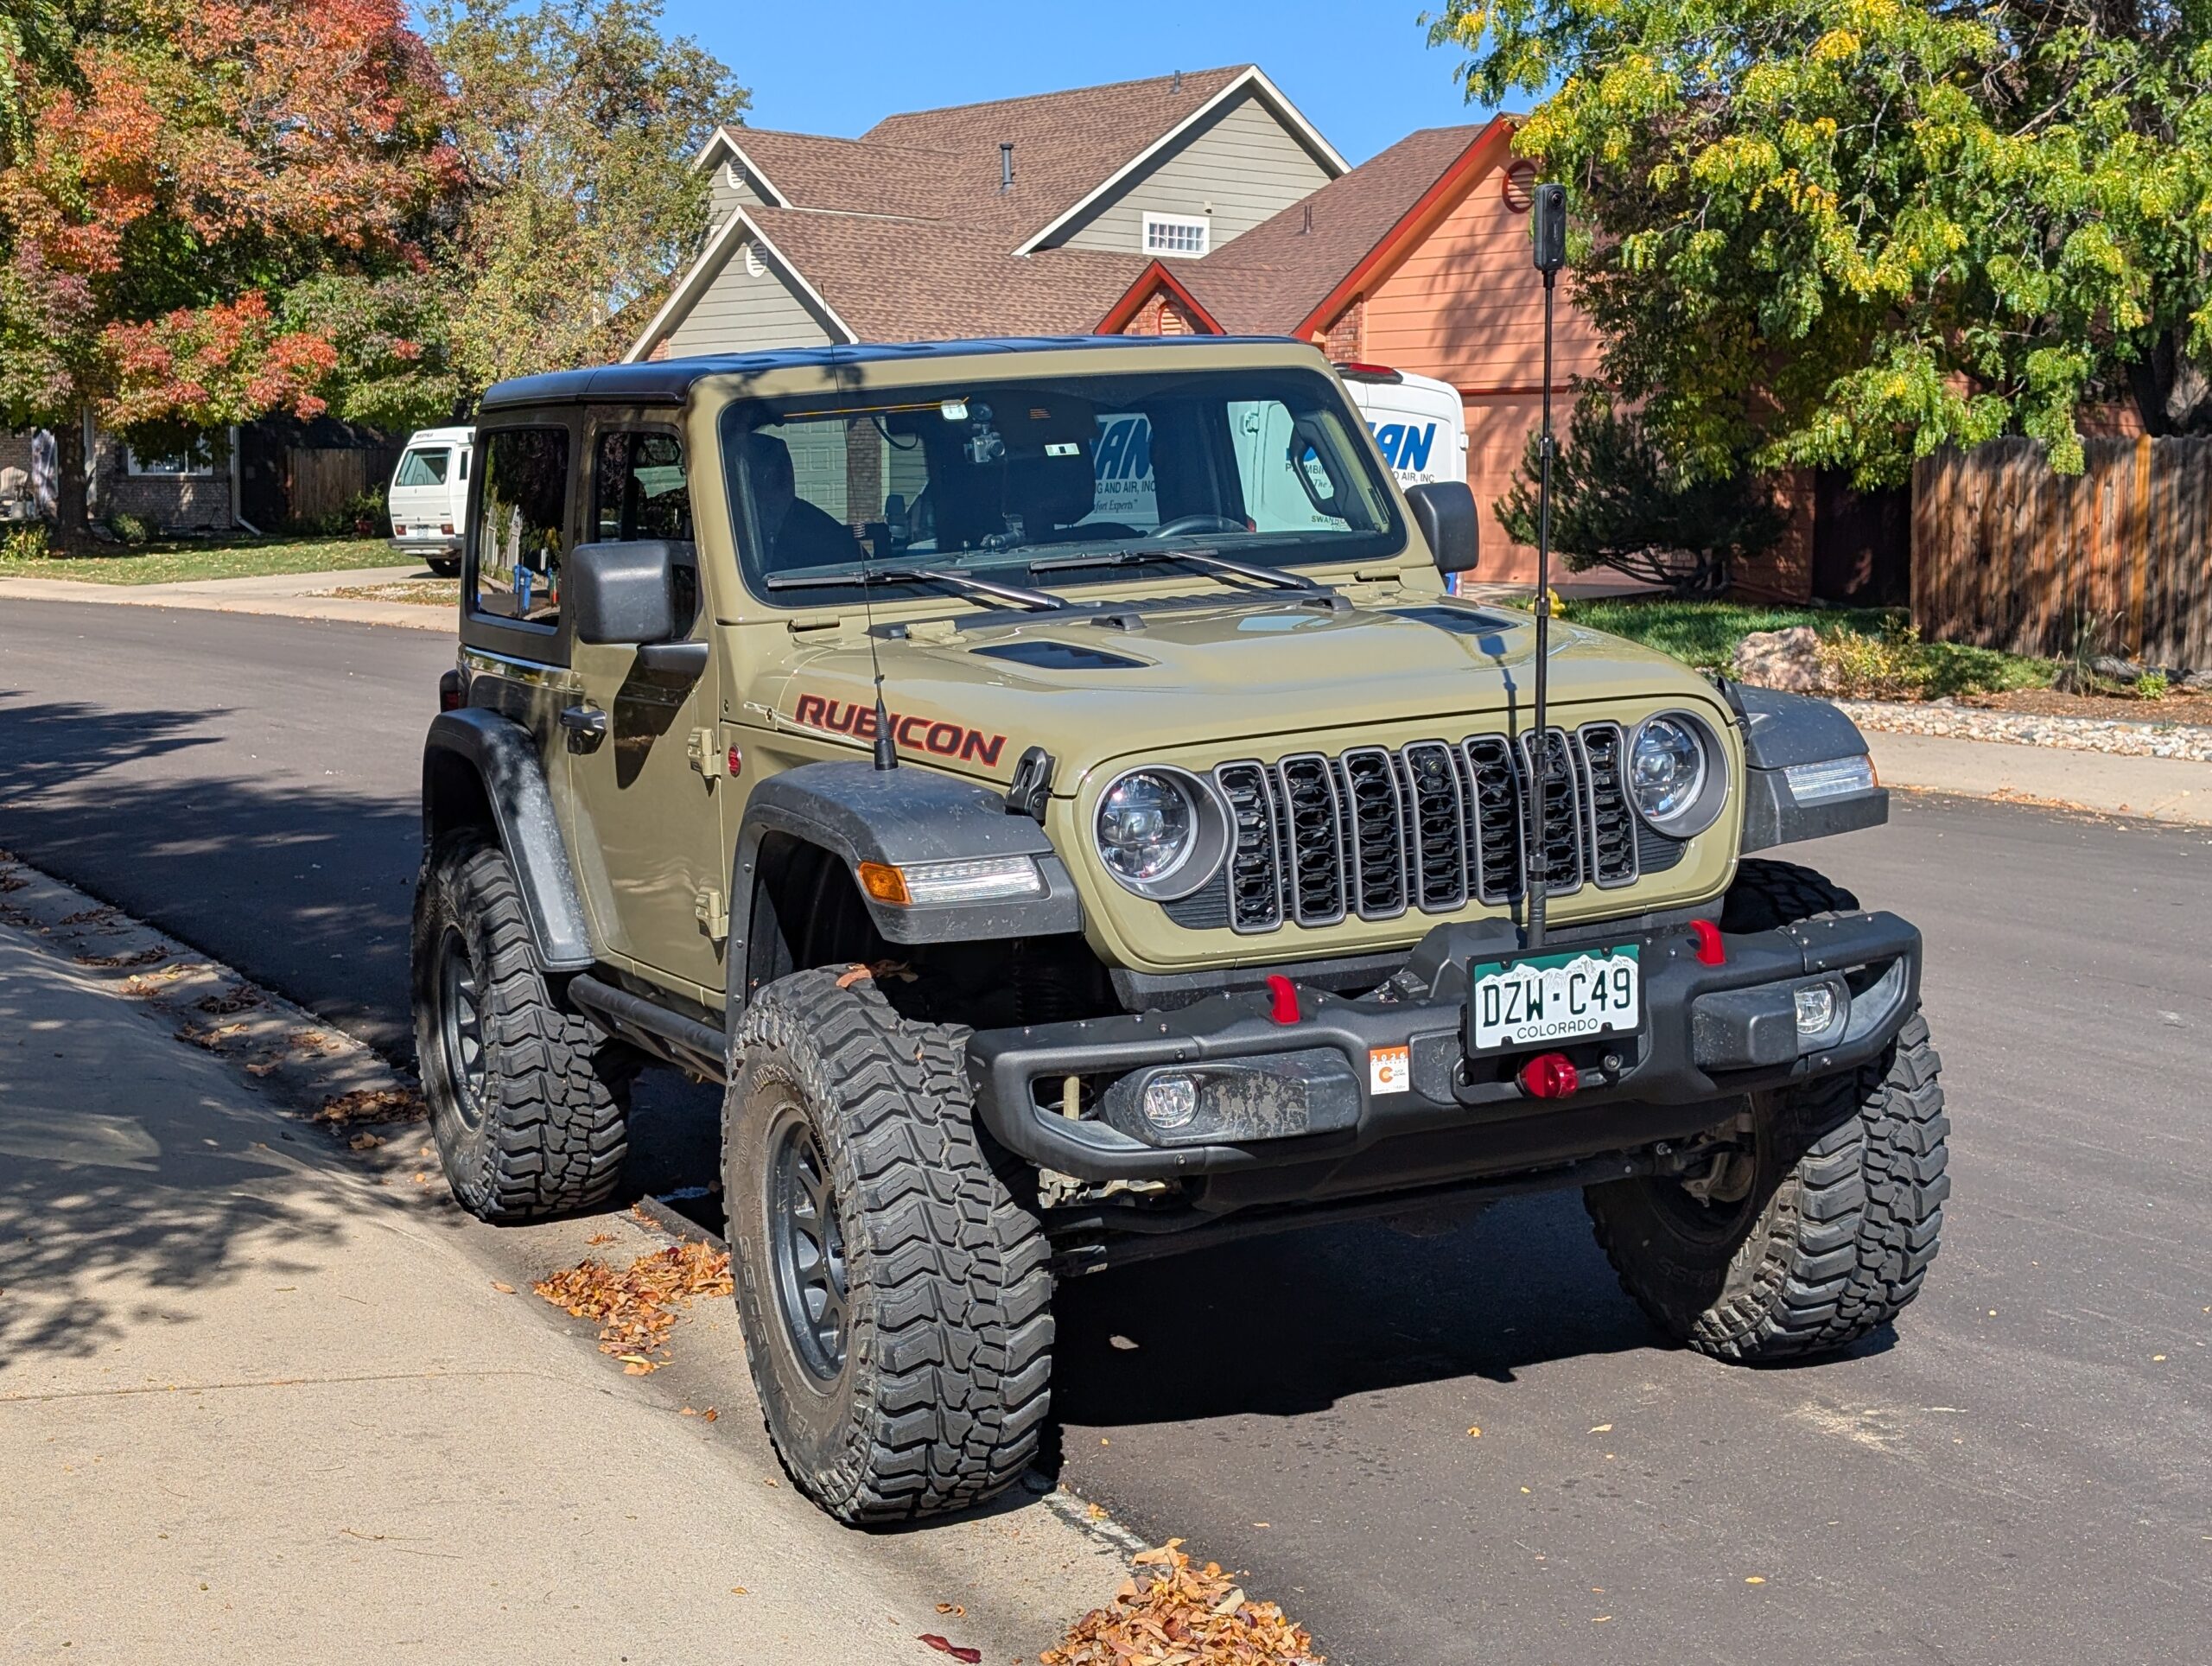
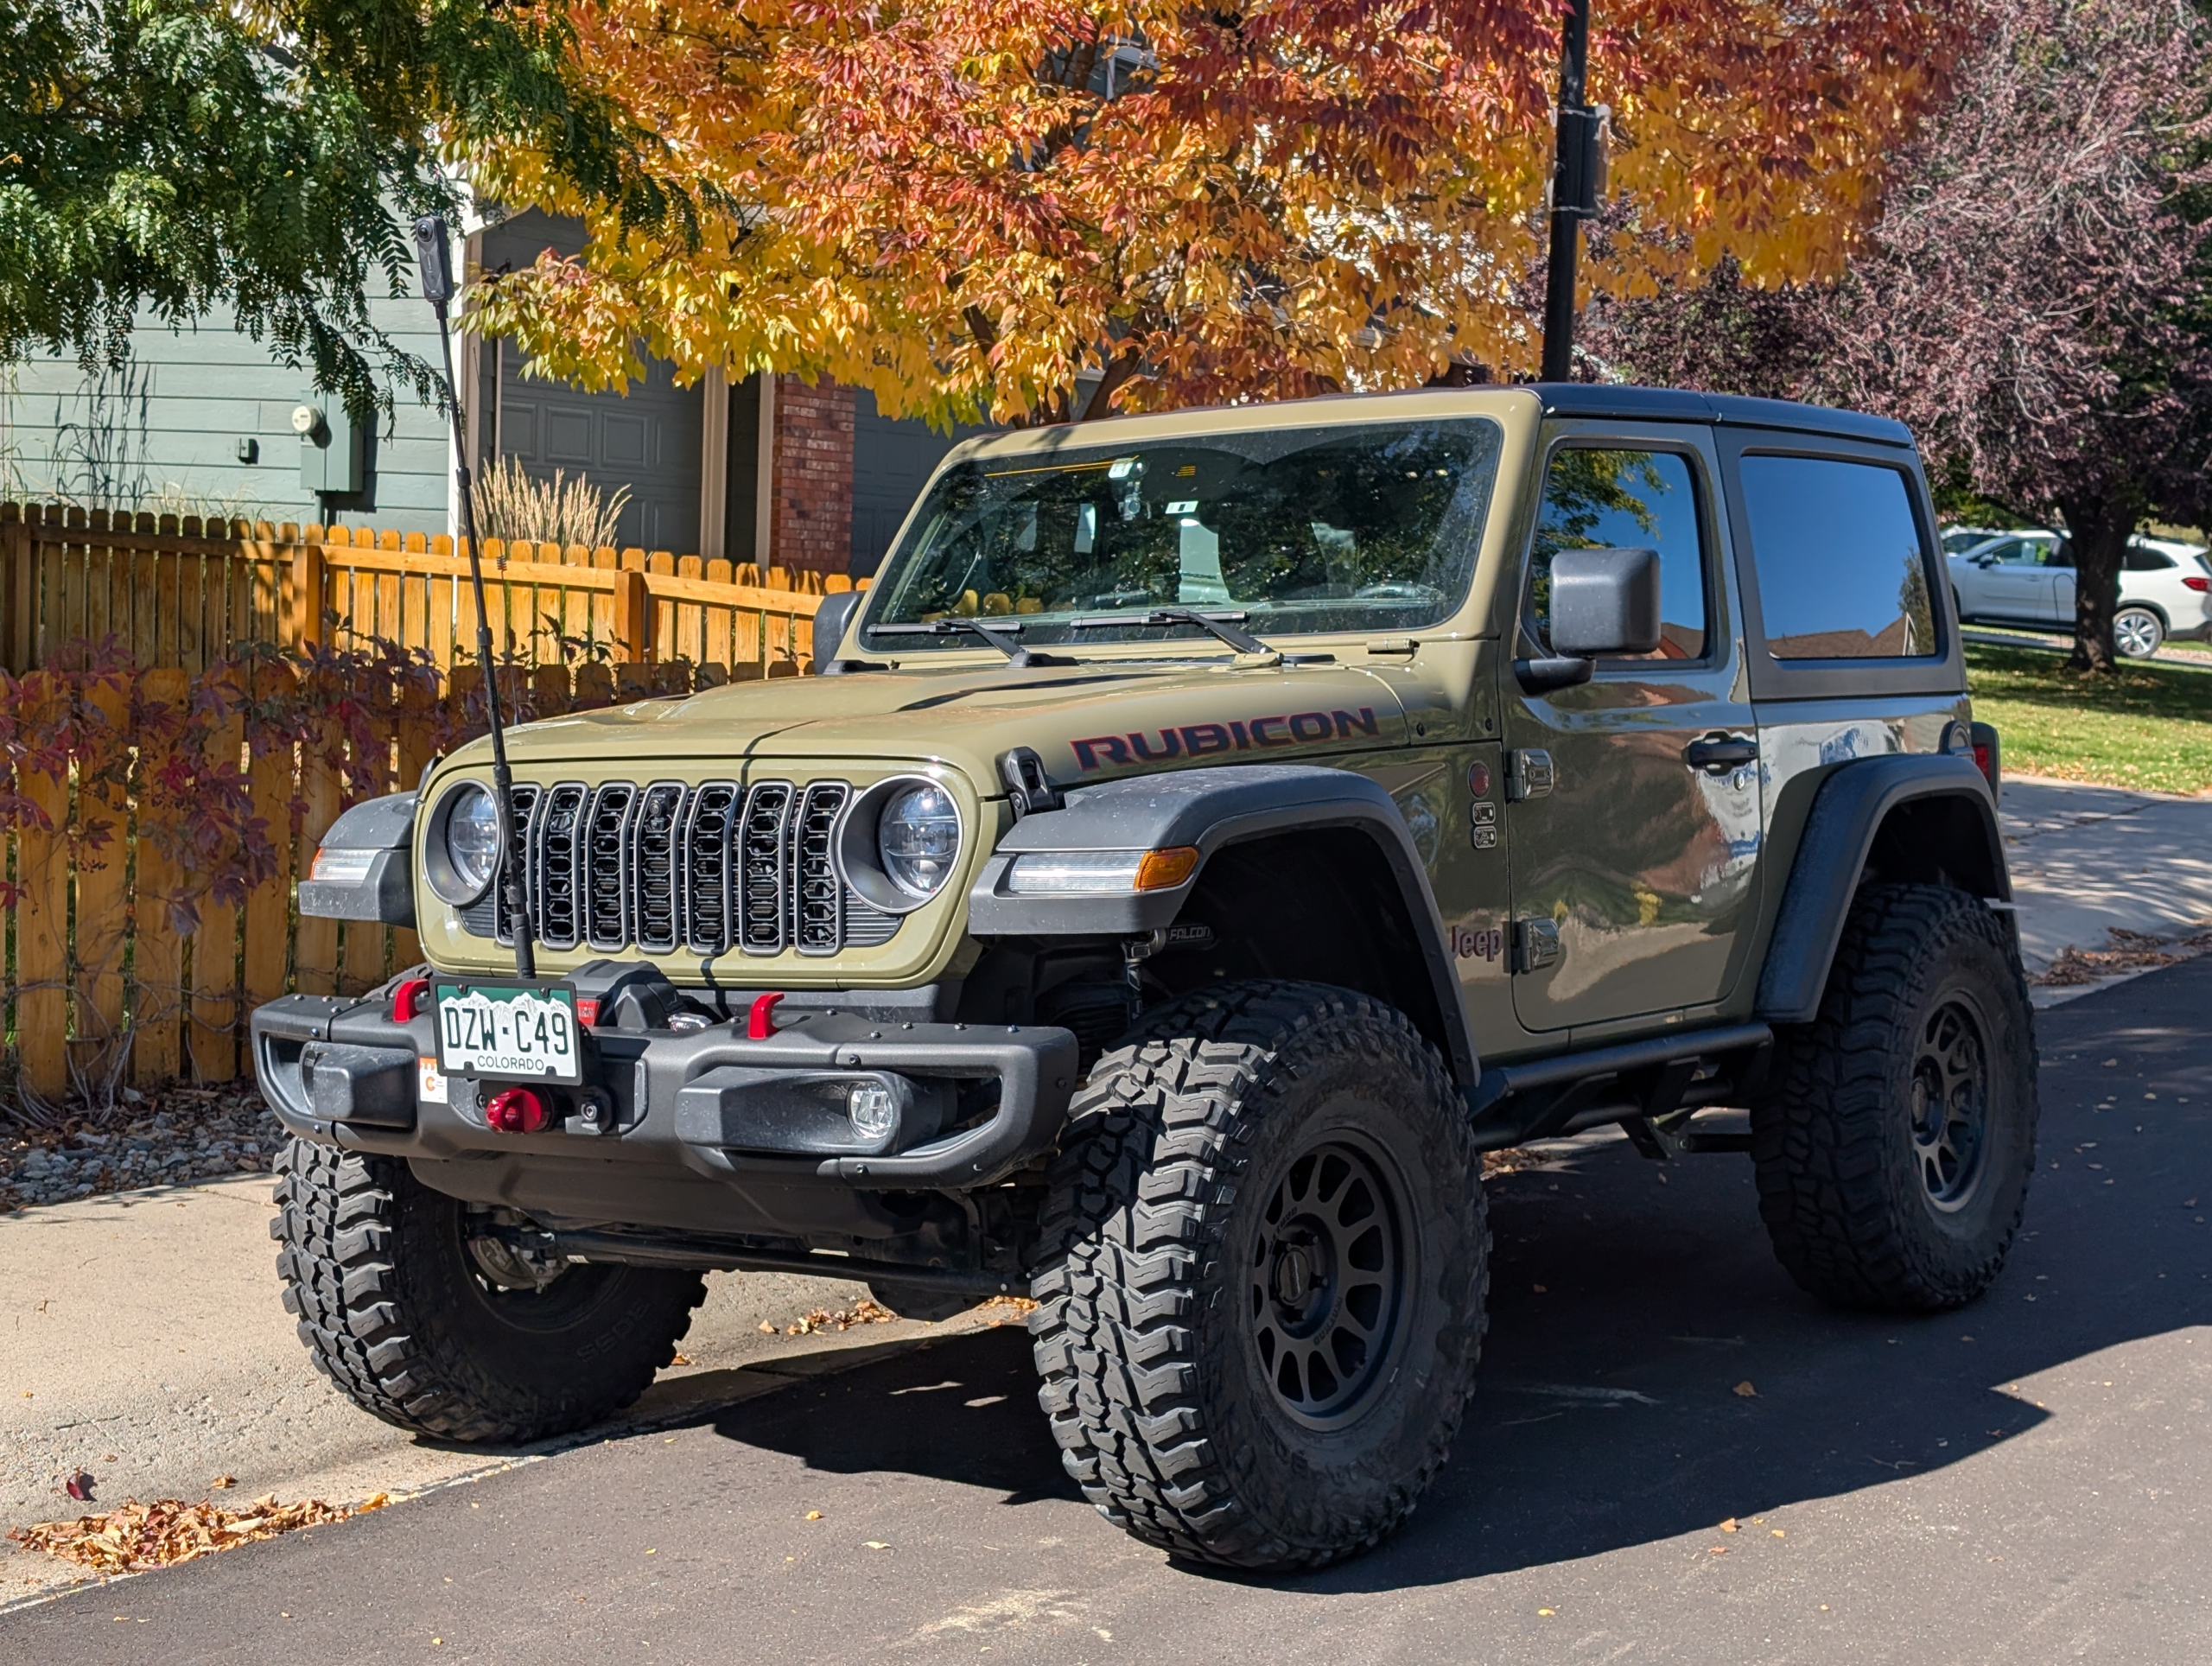
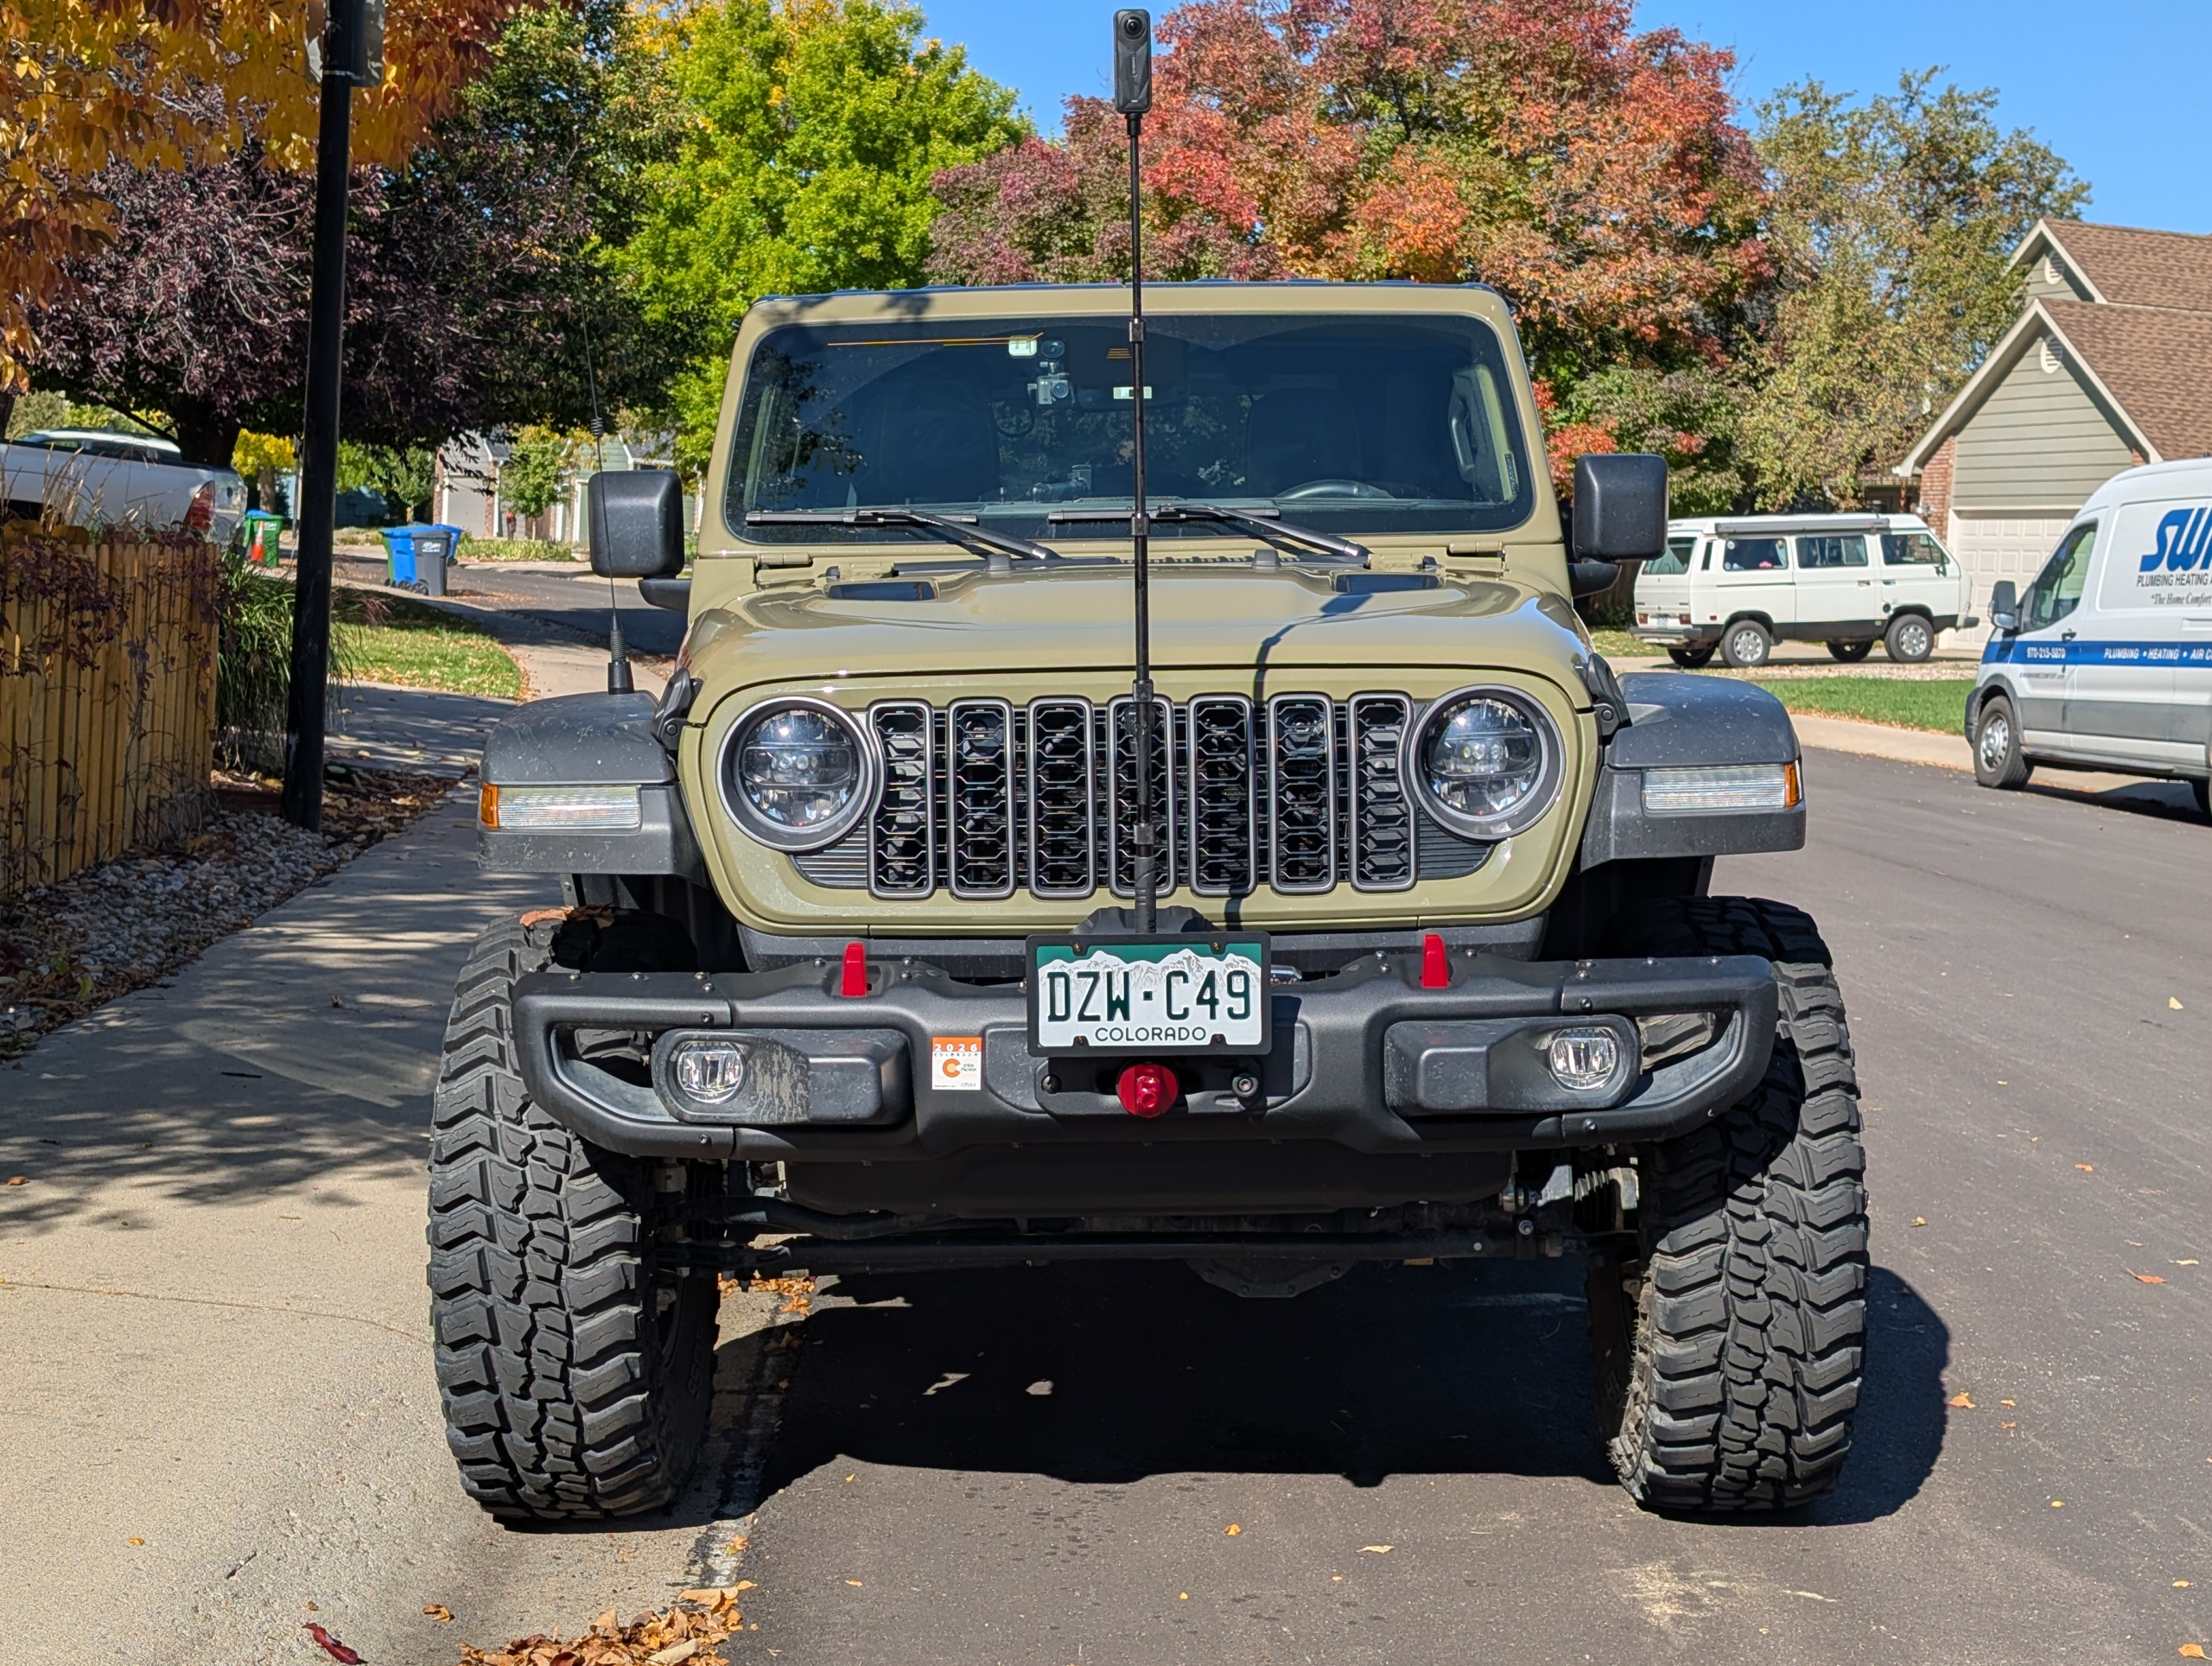
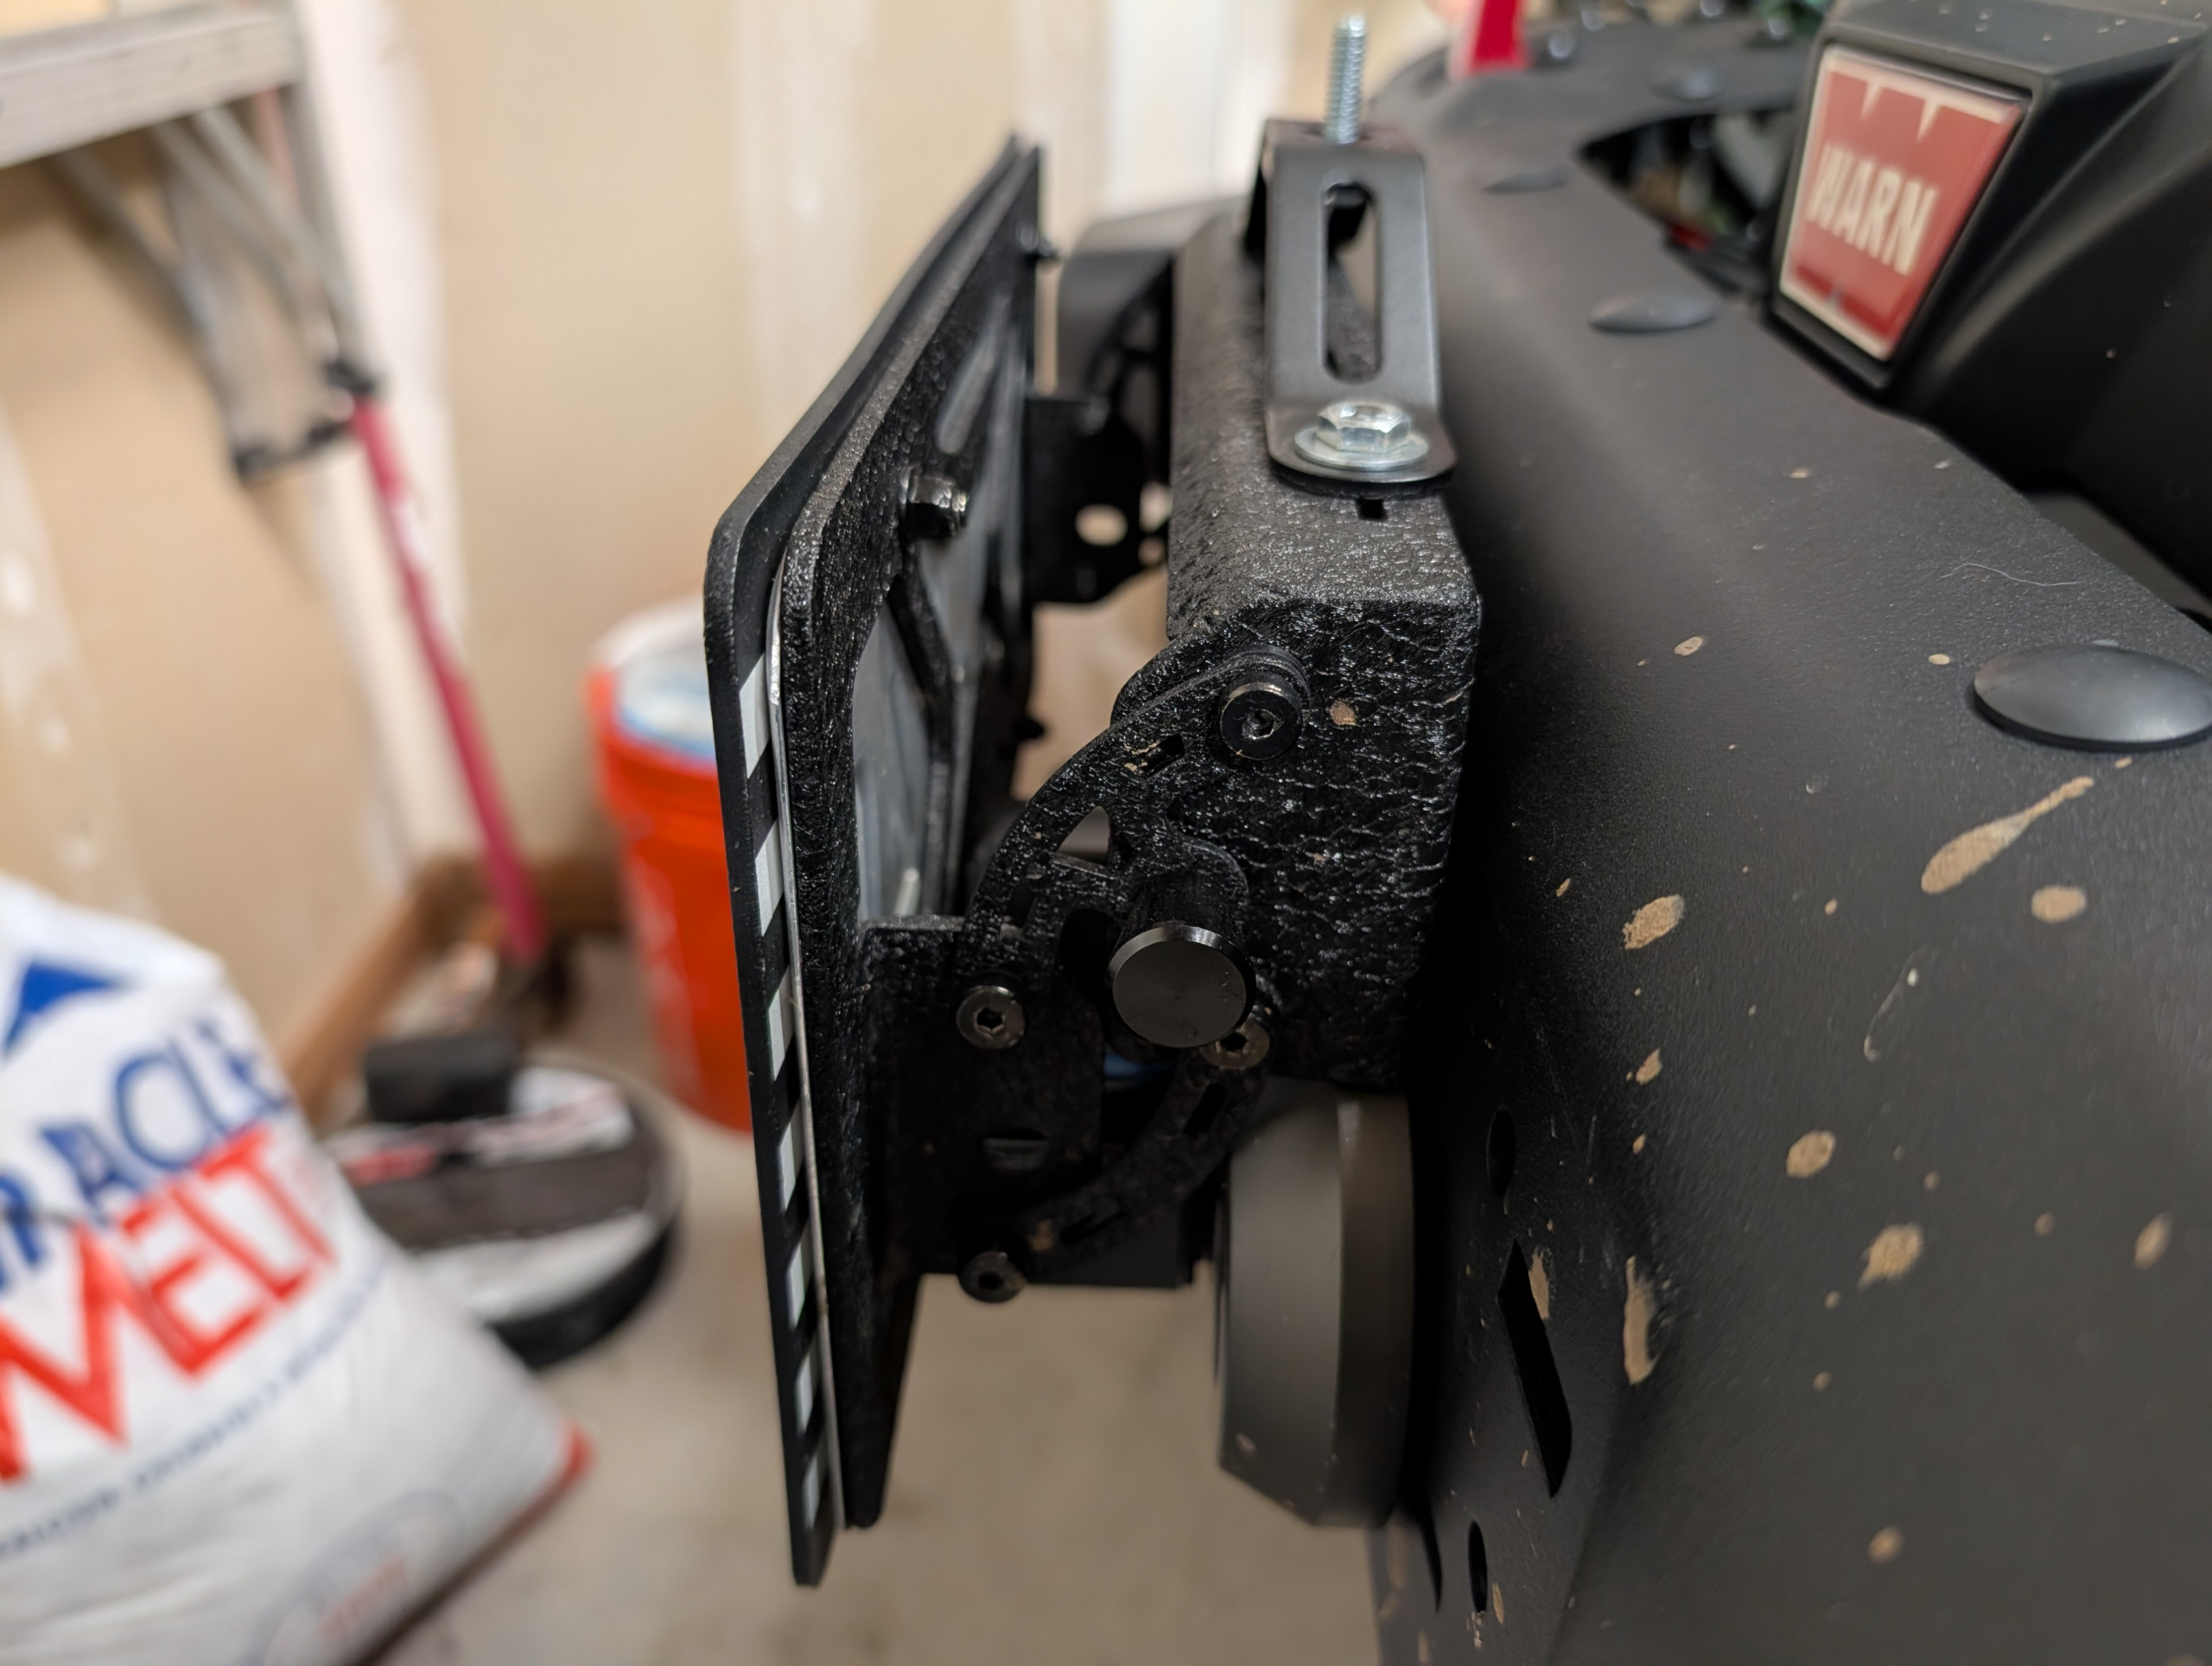
Mounting hardware
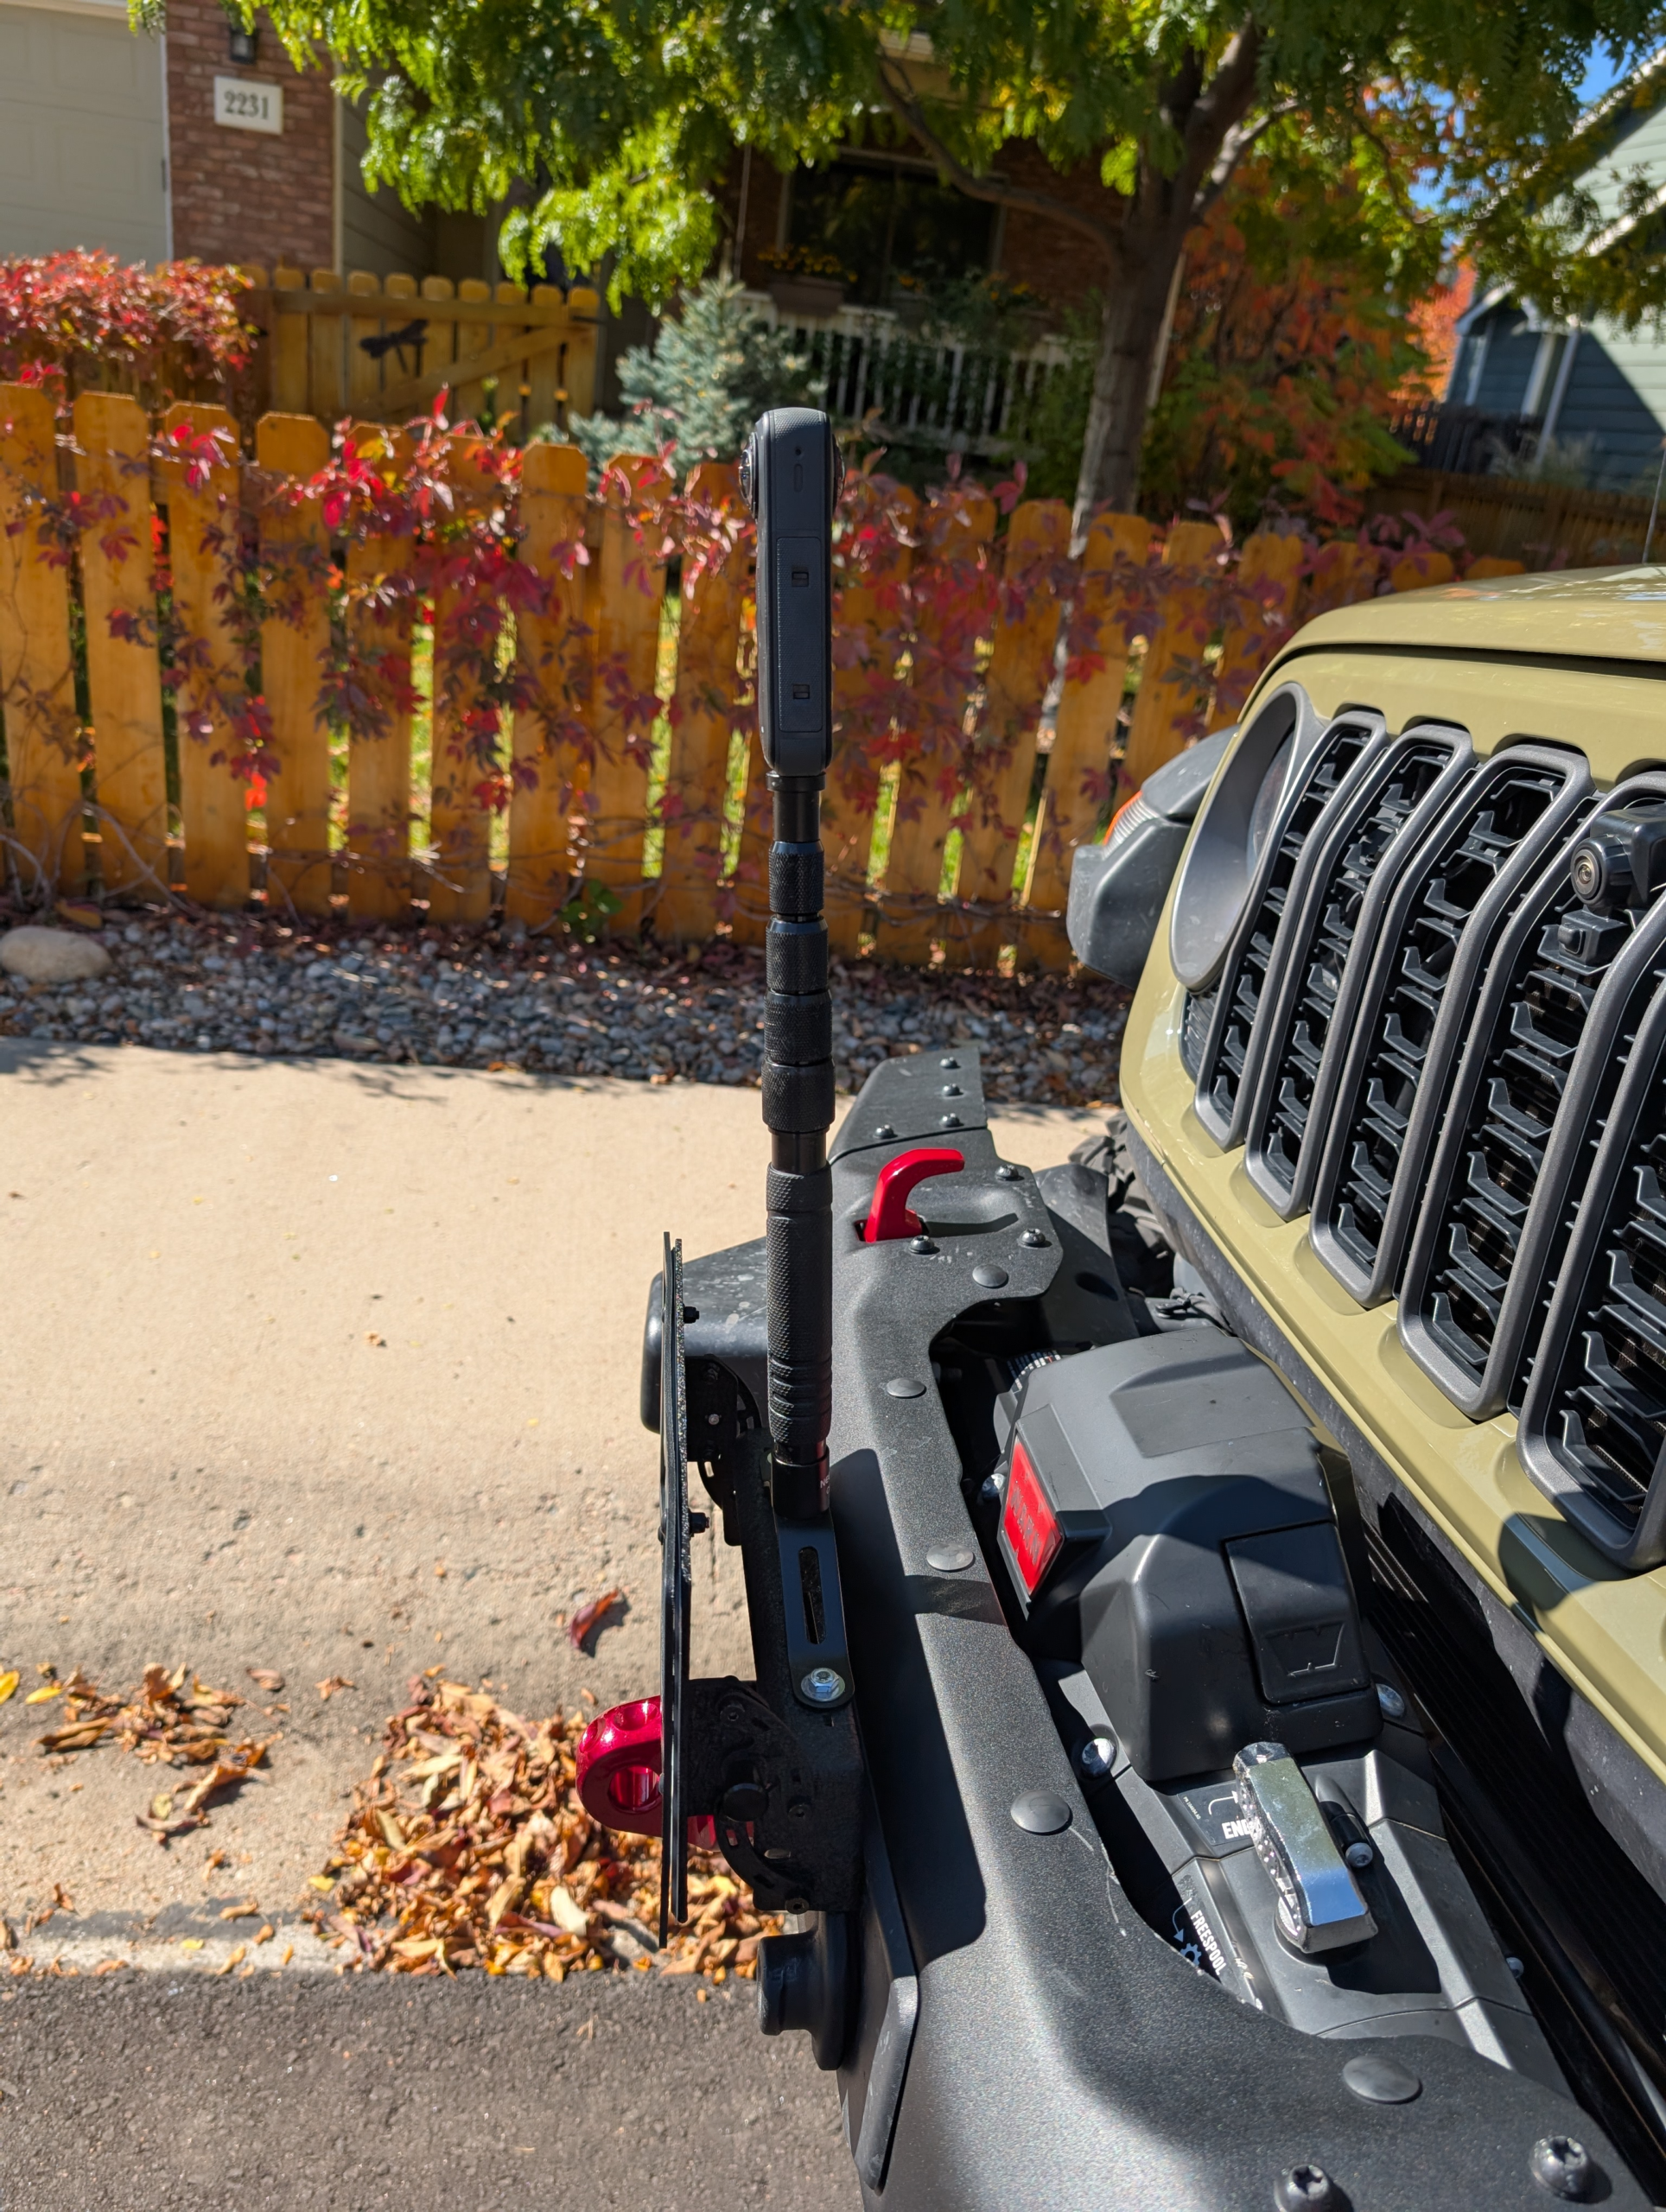
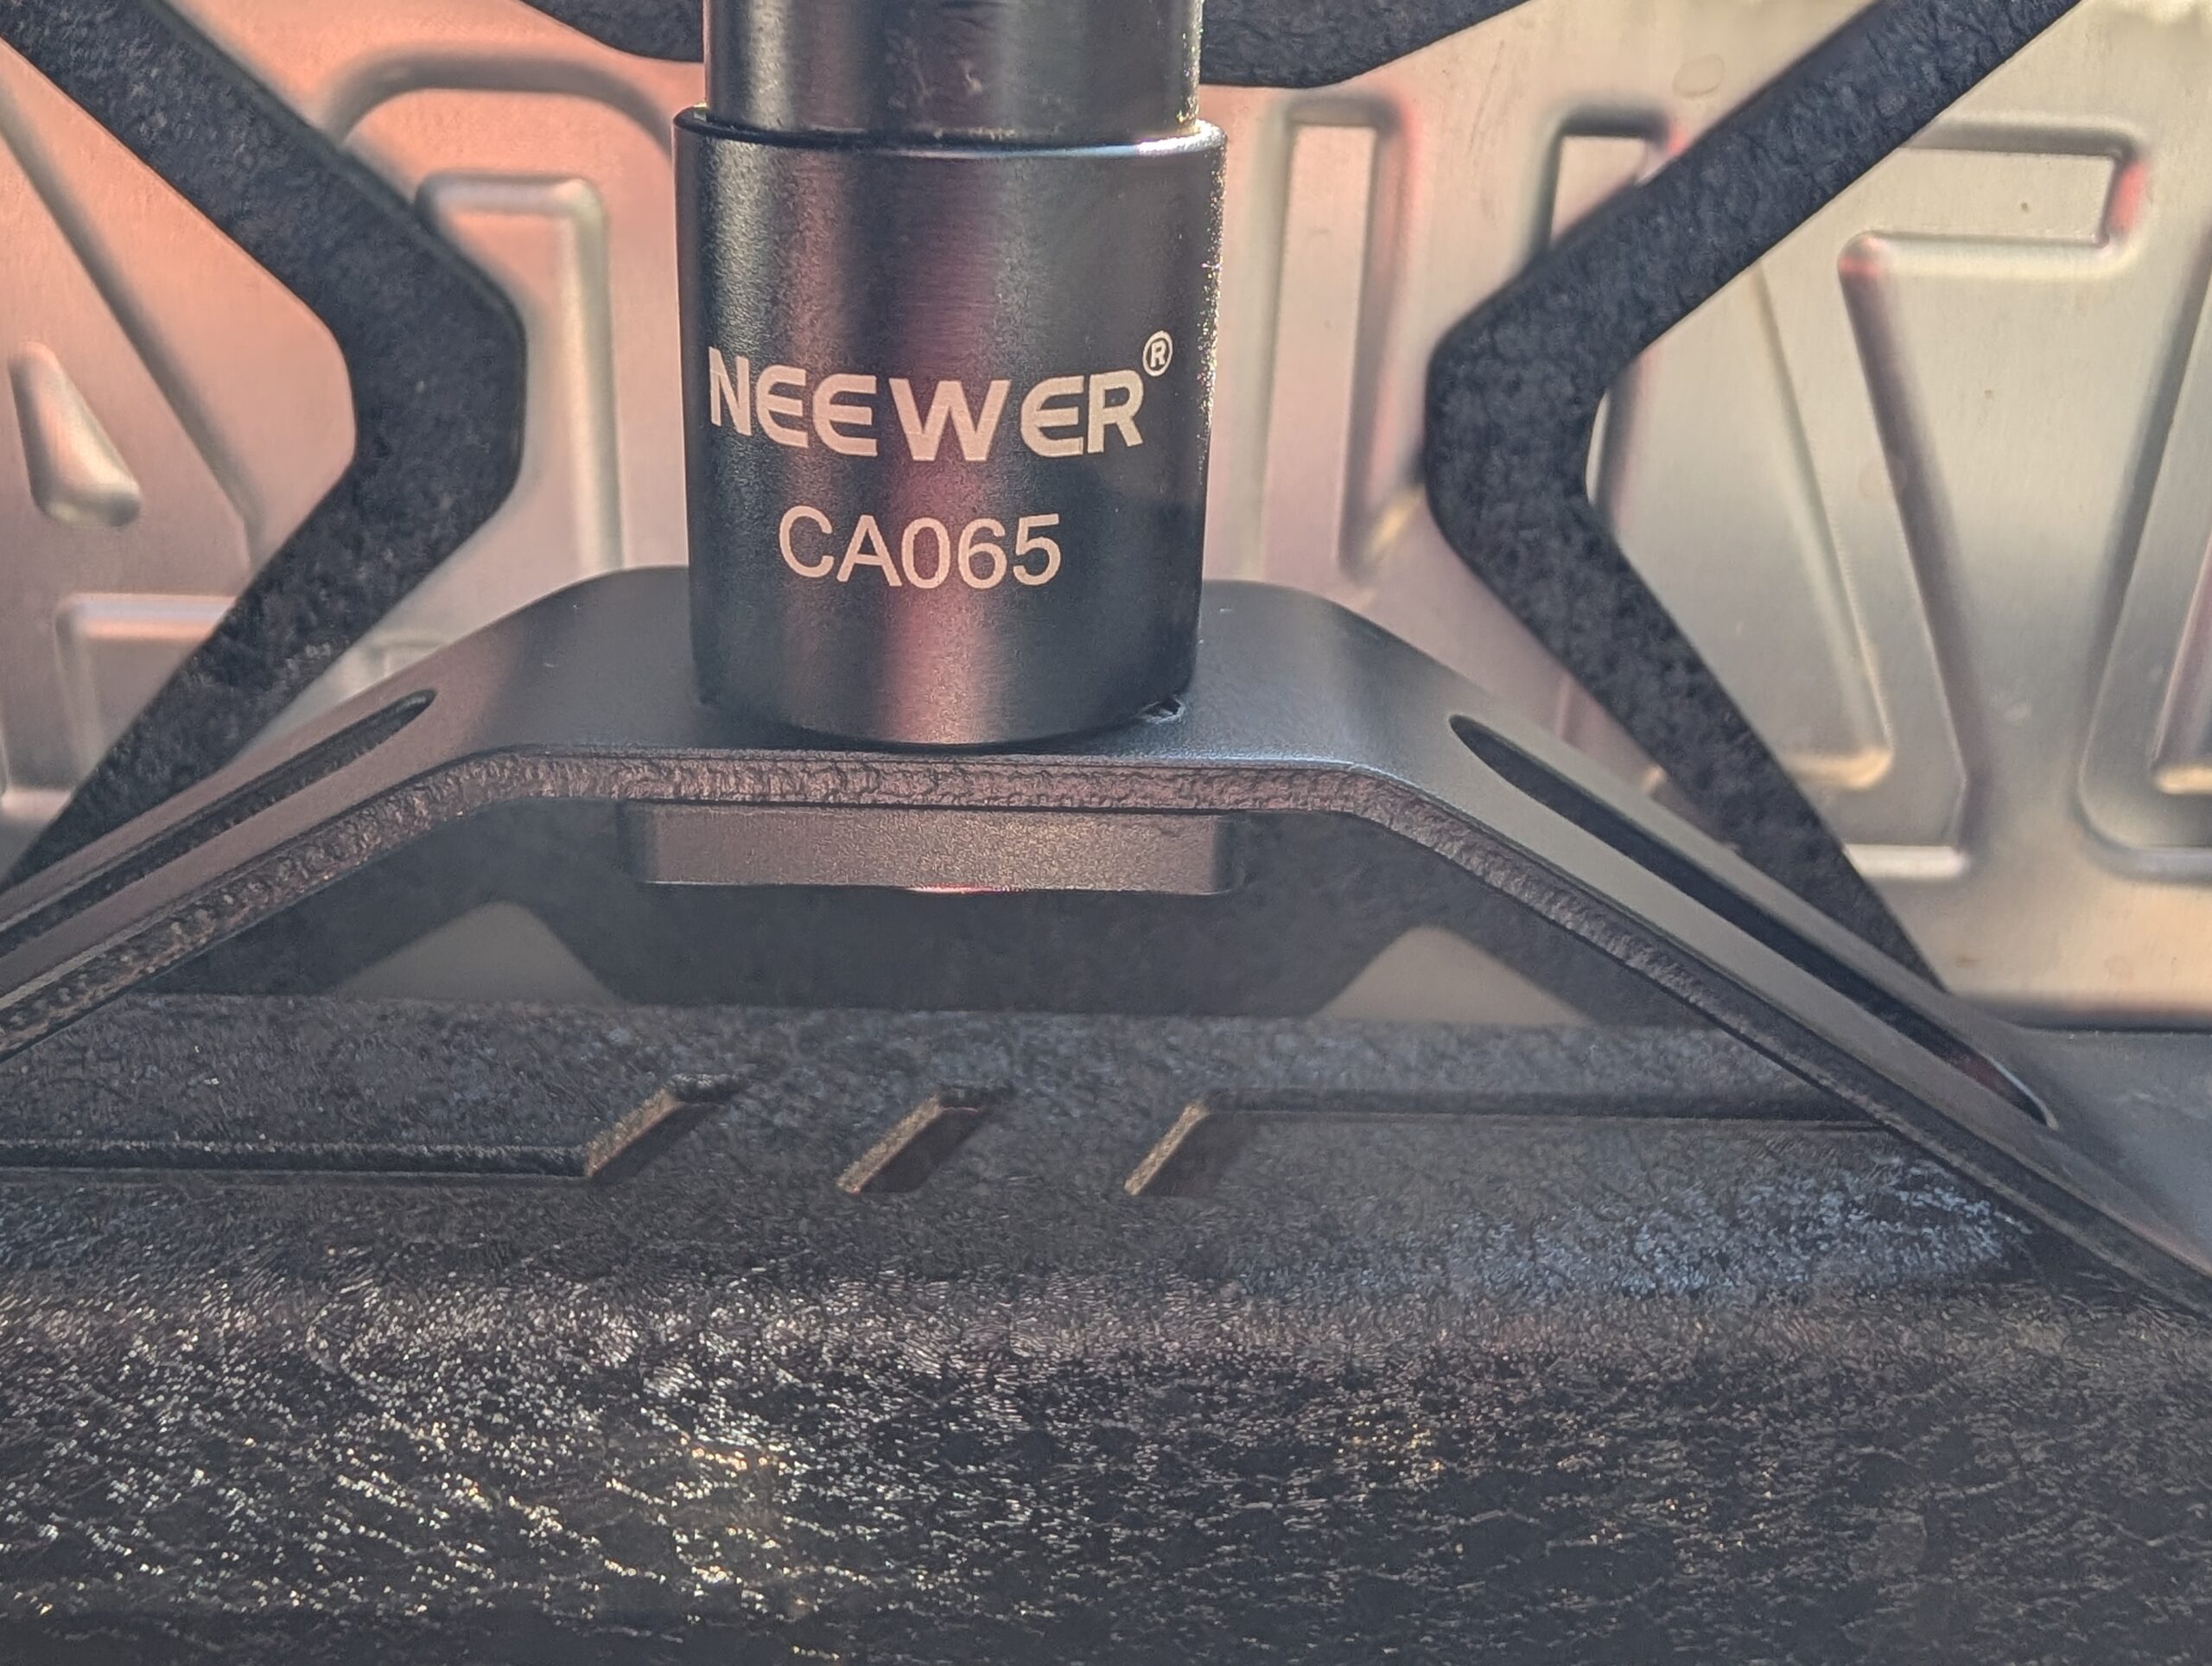
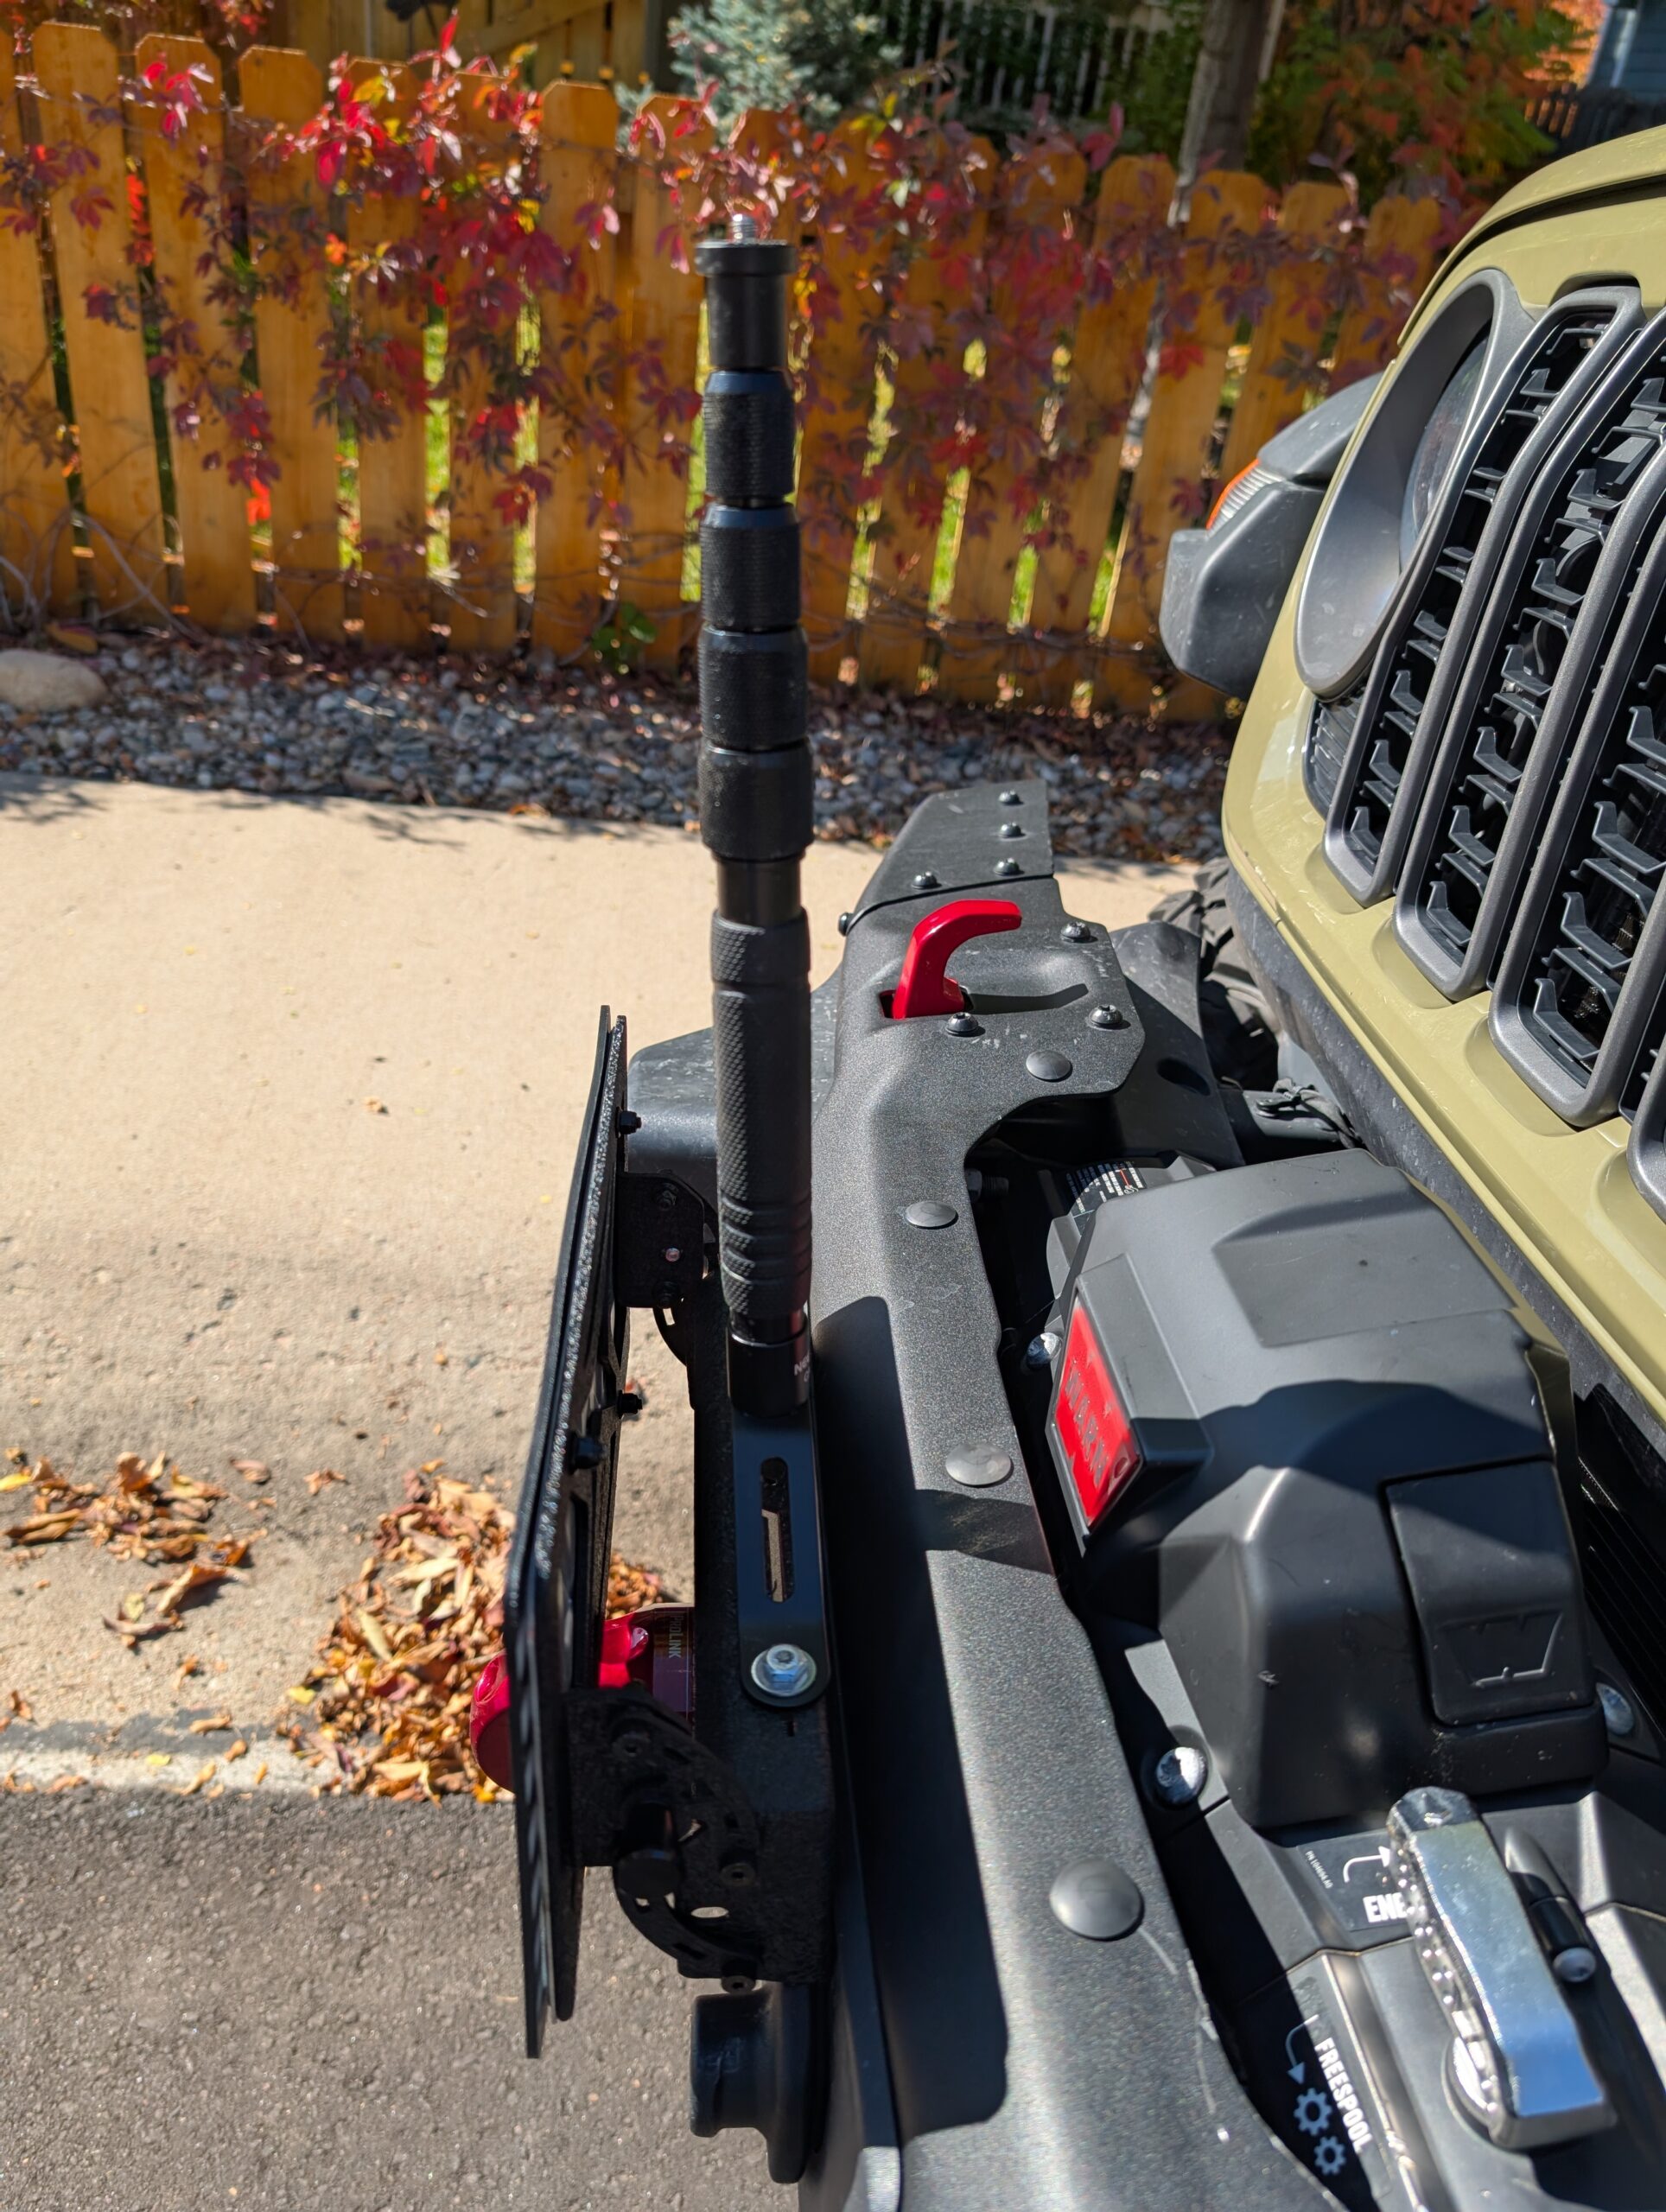
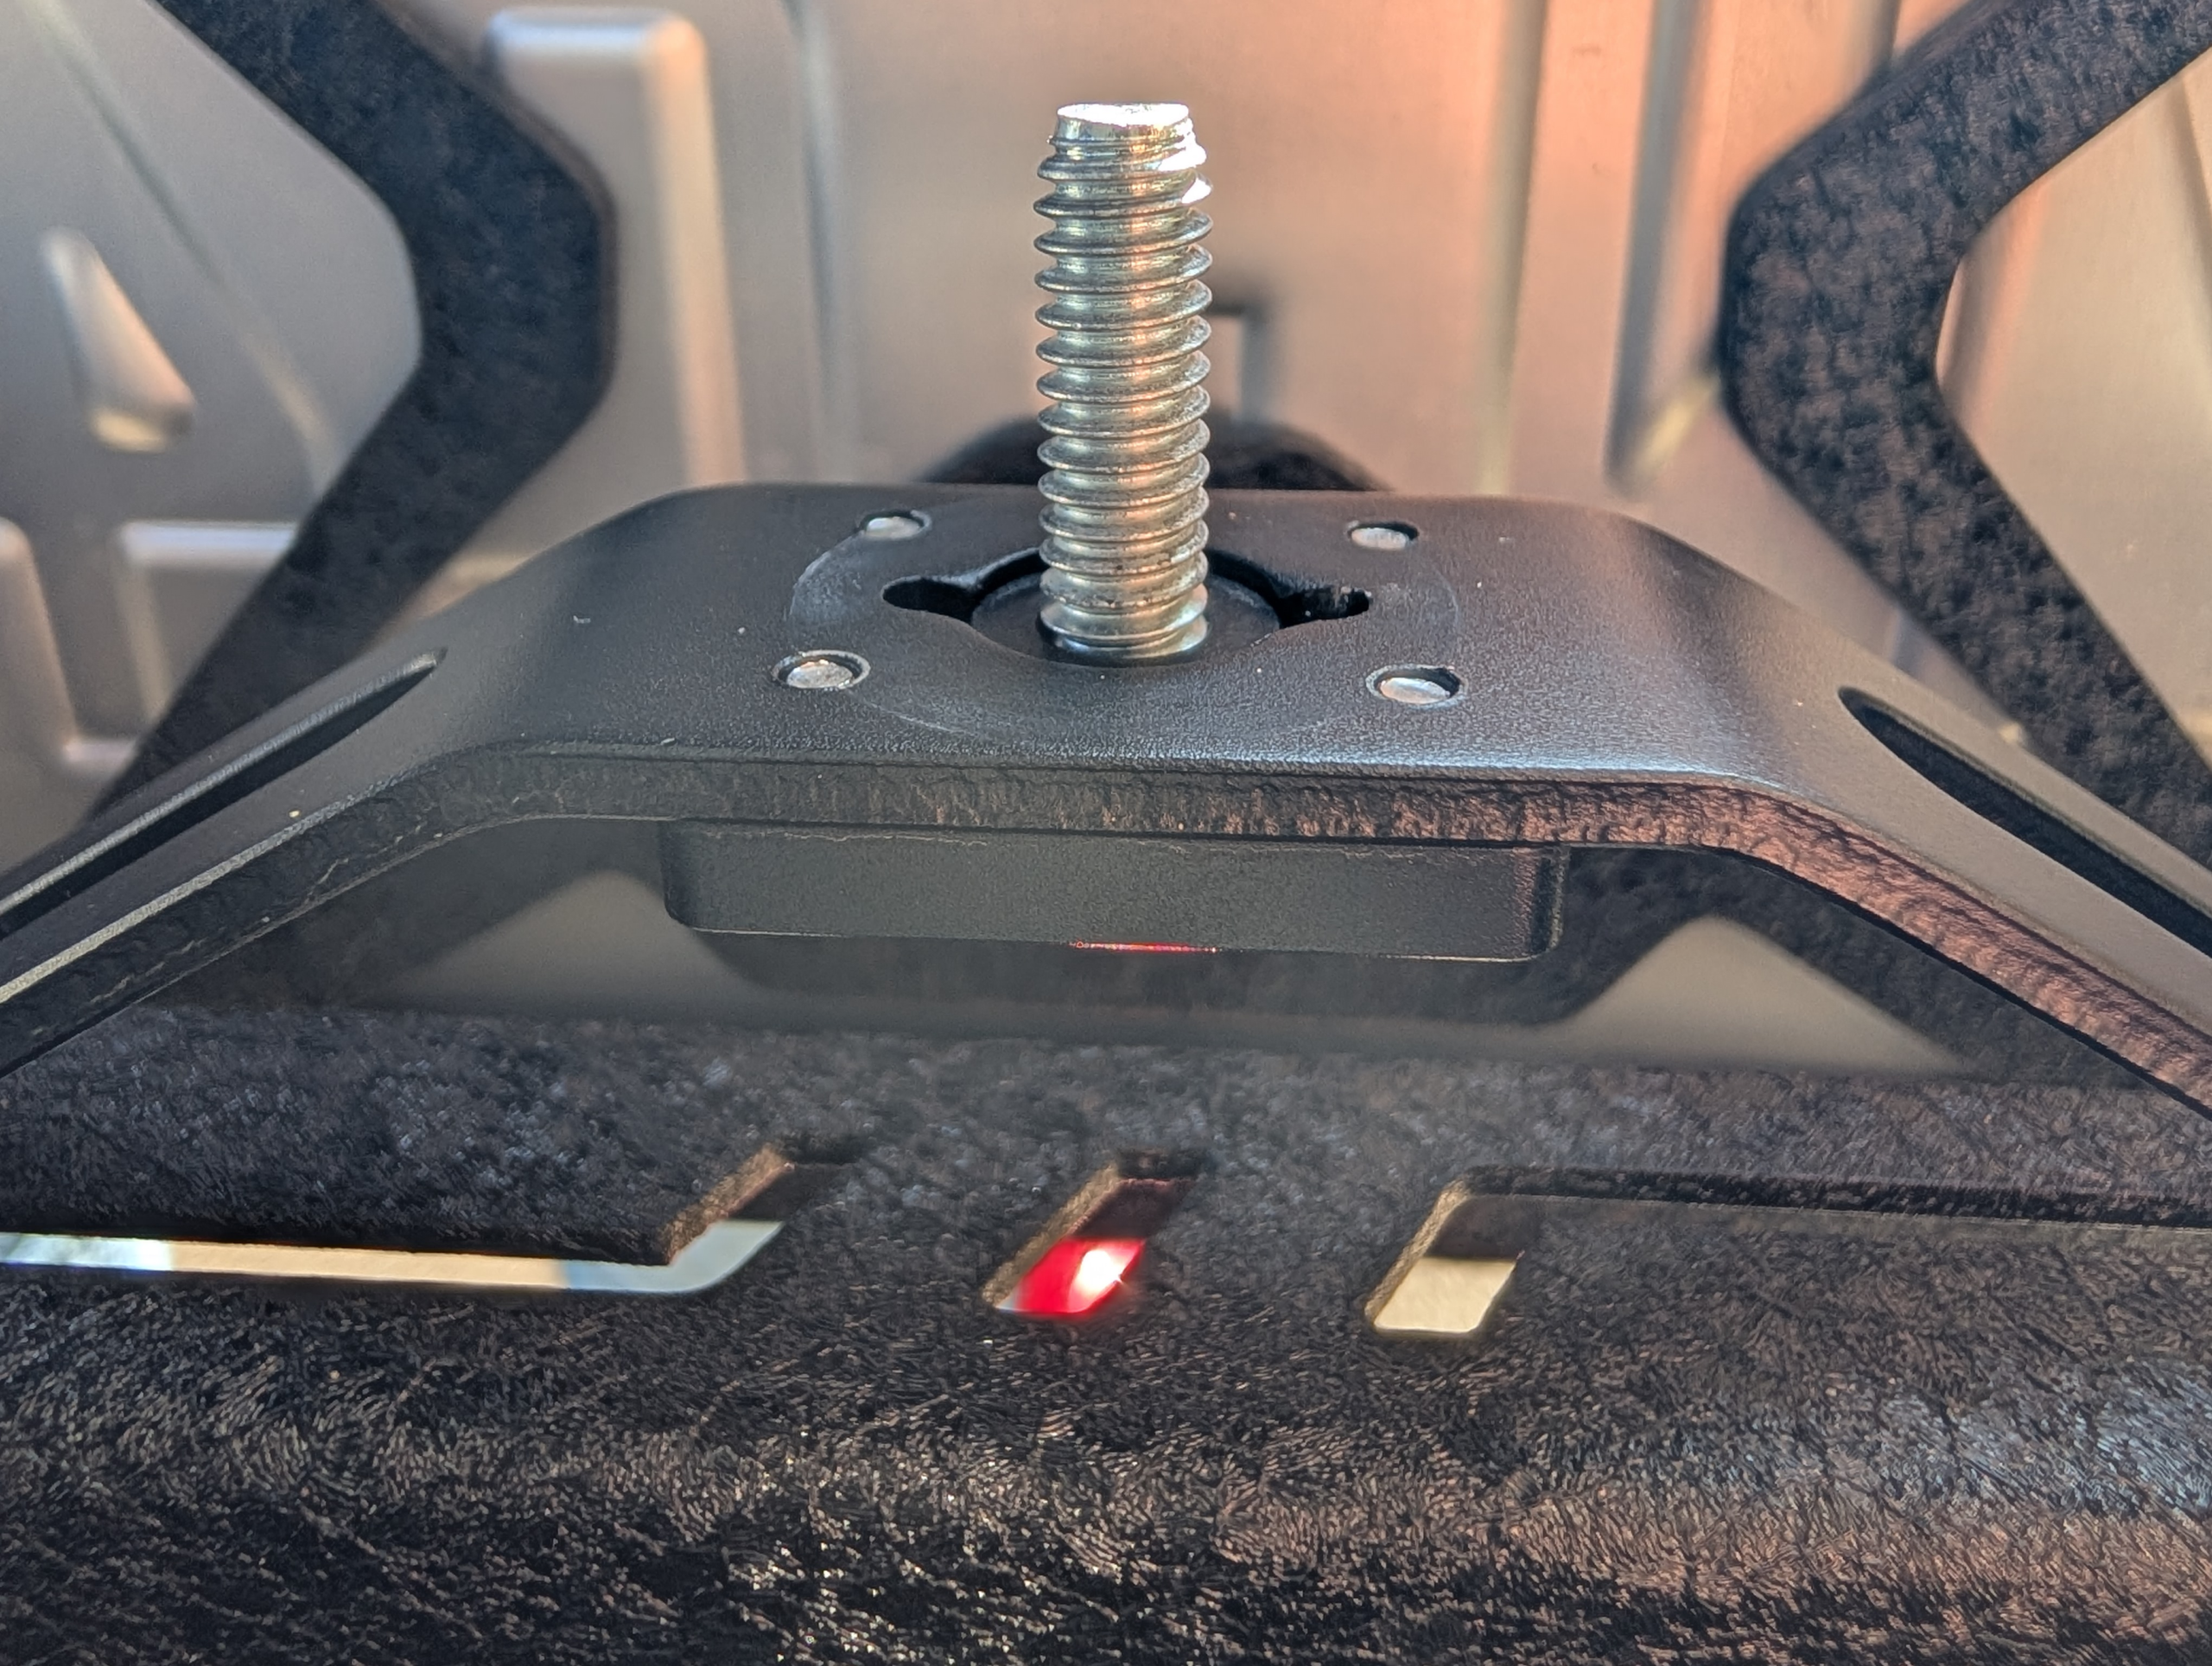
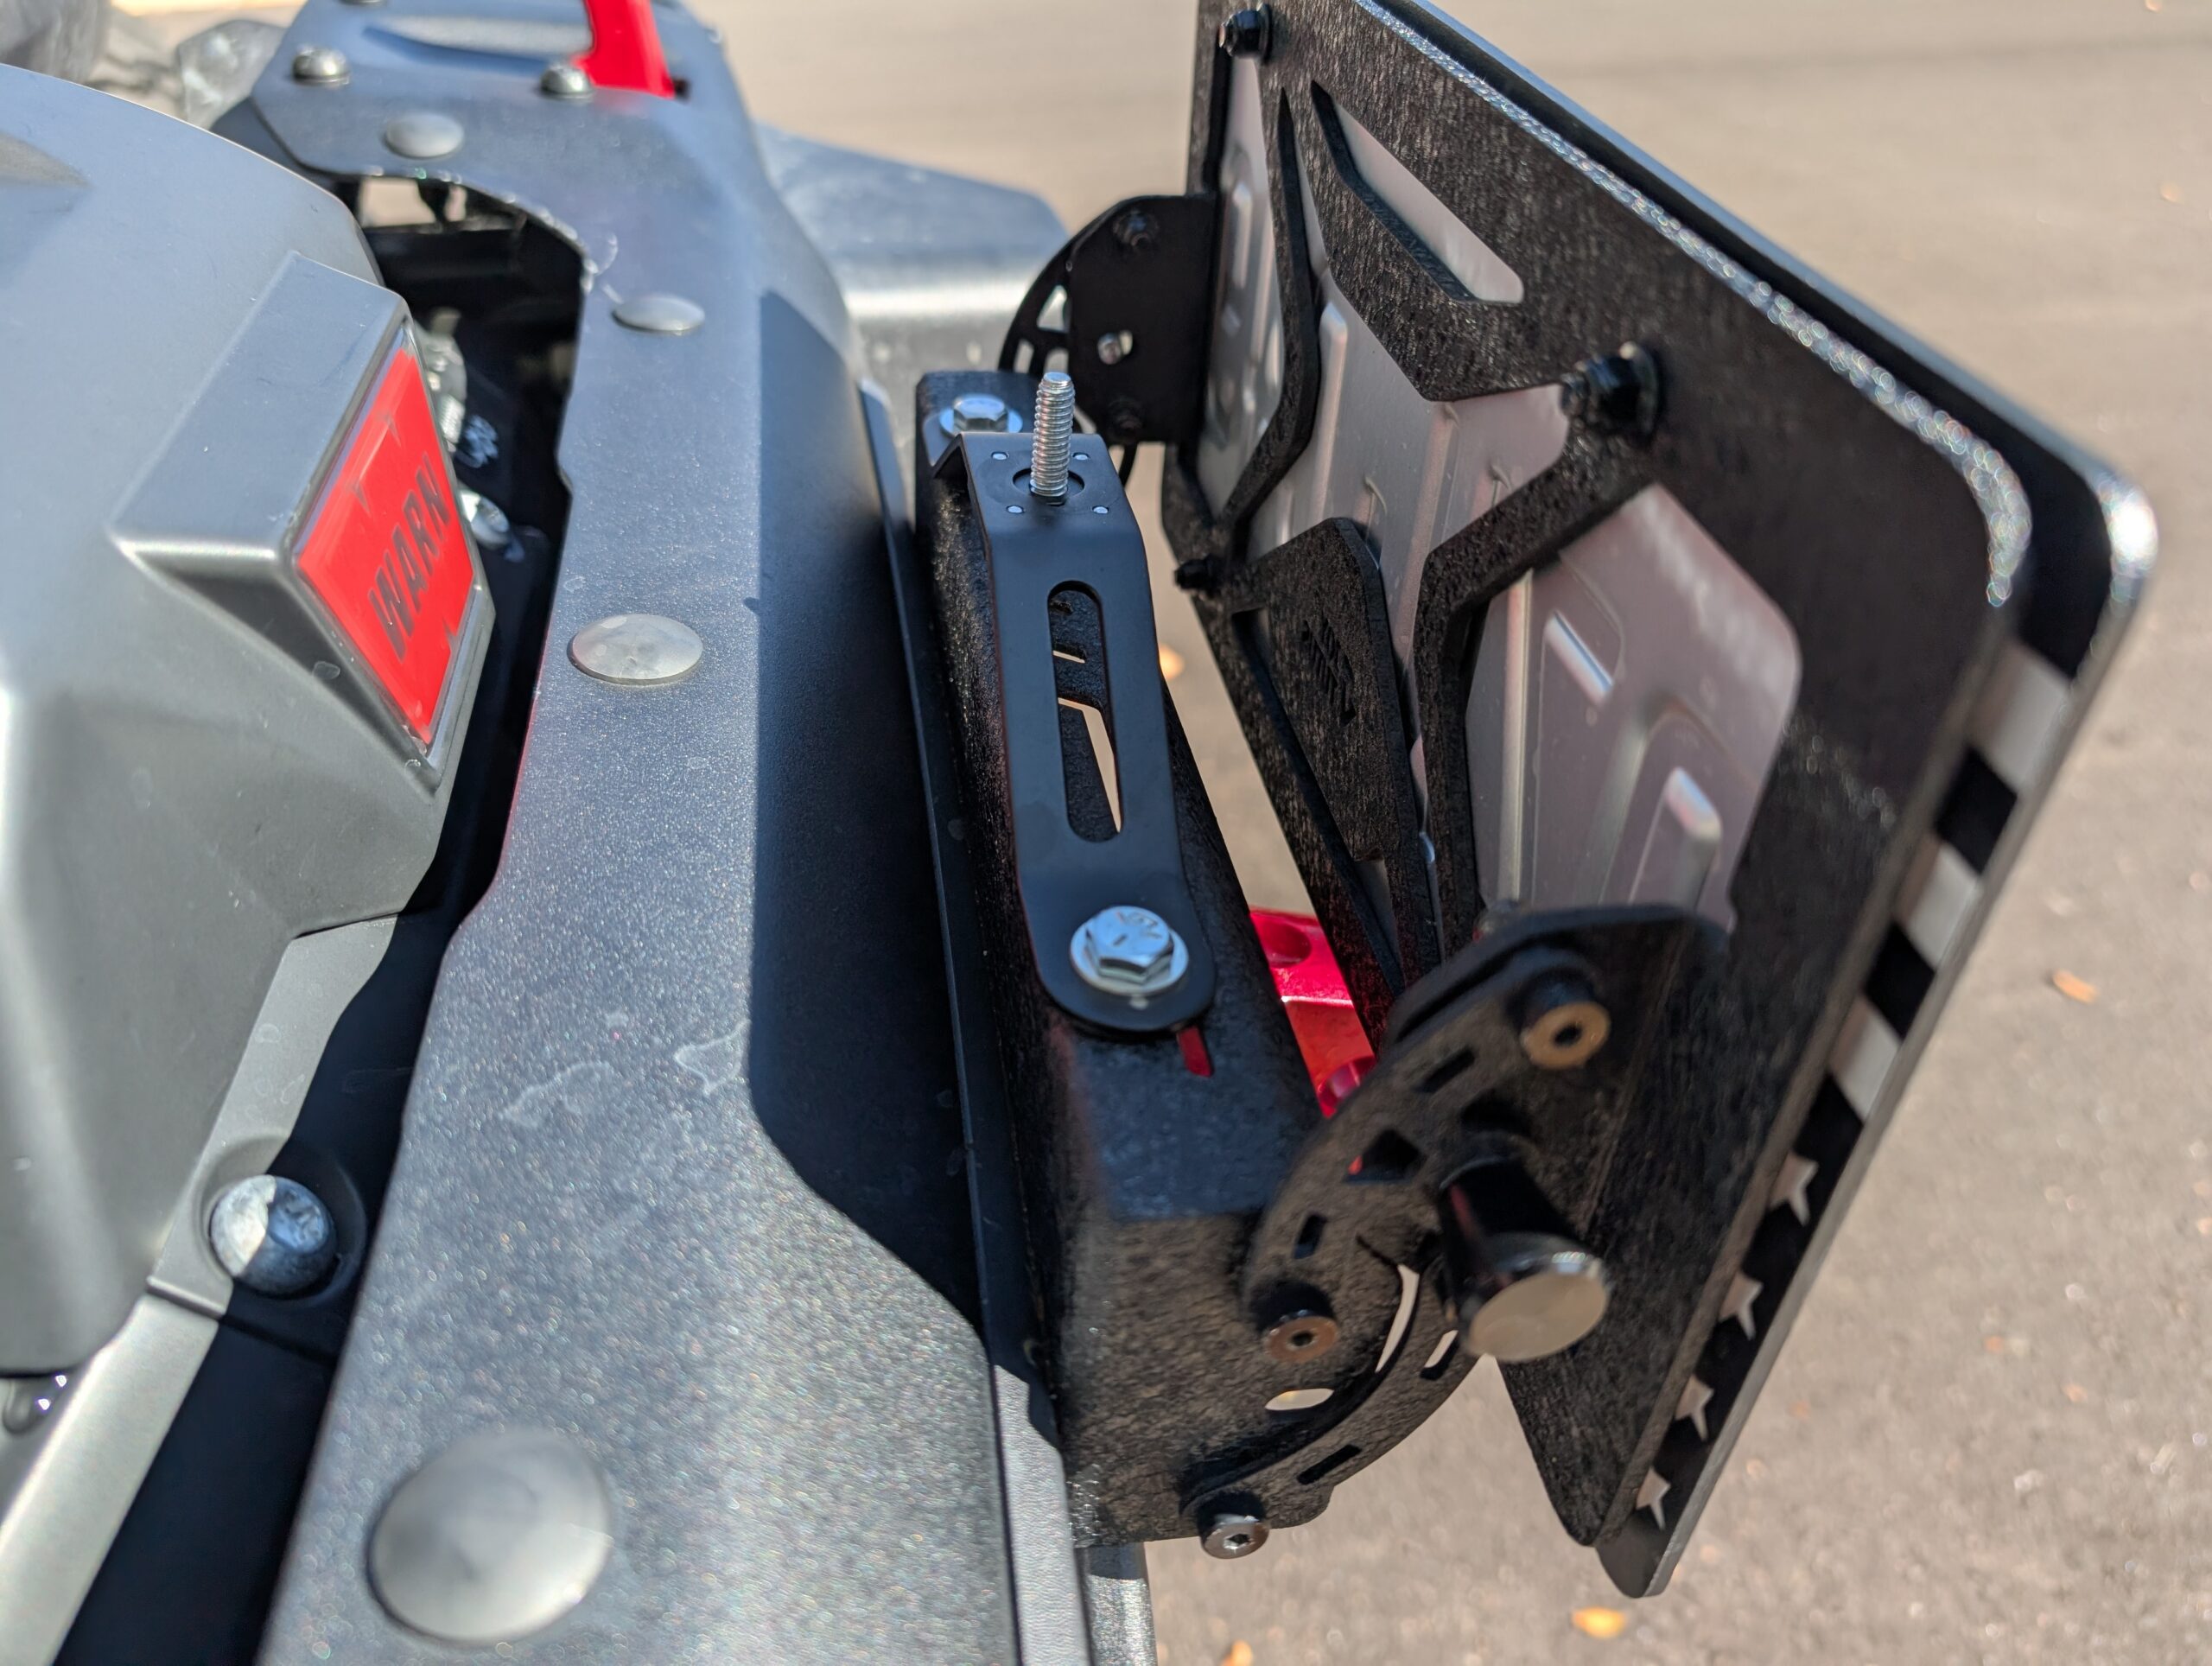
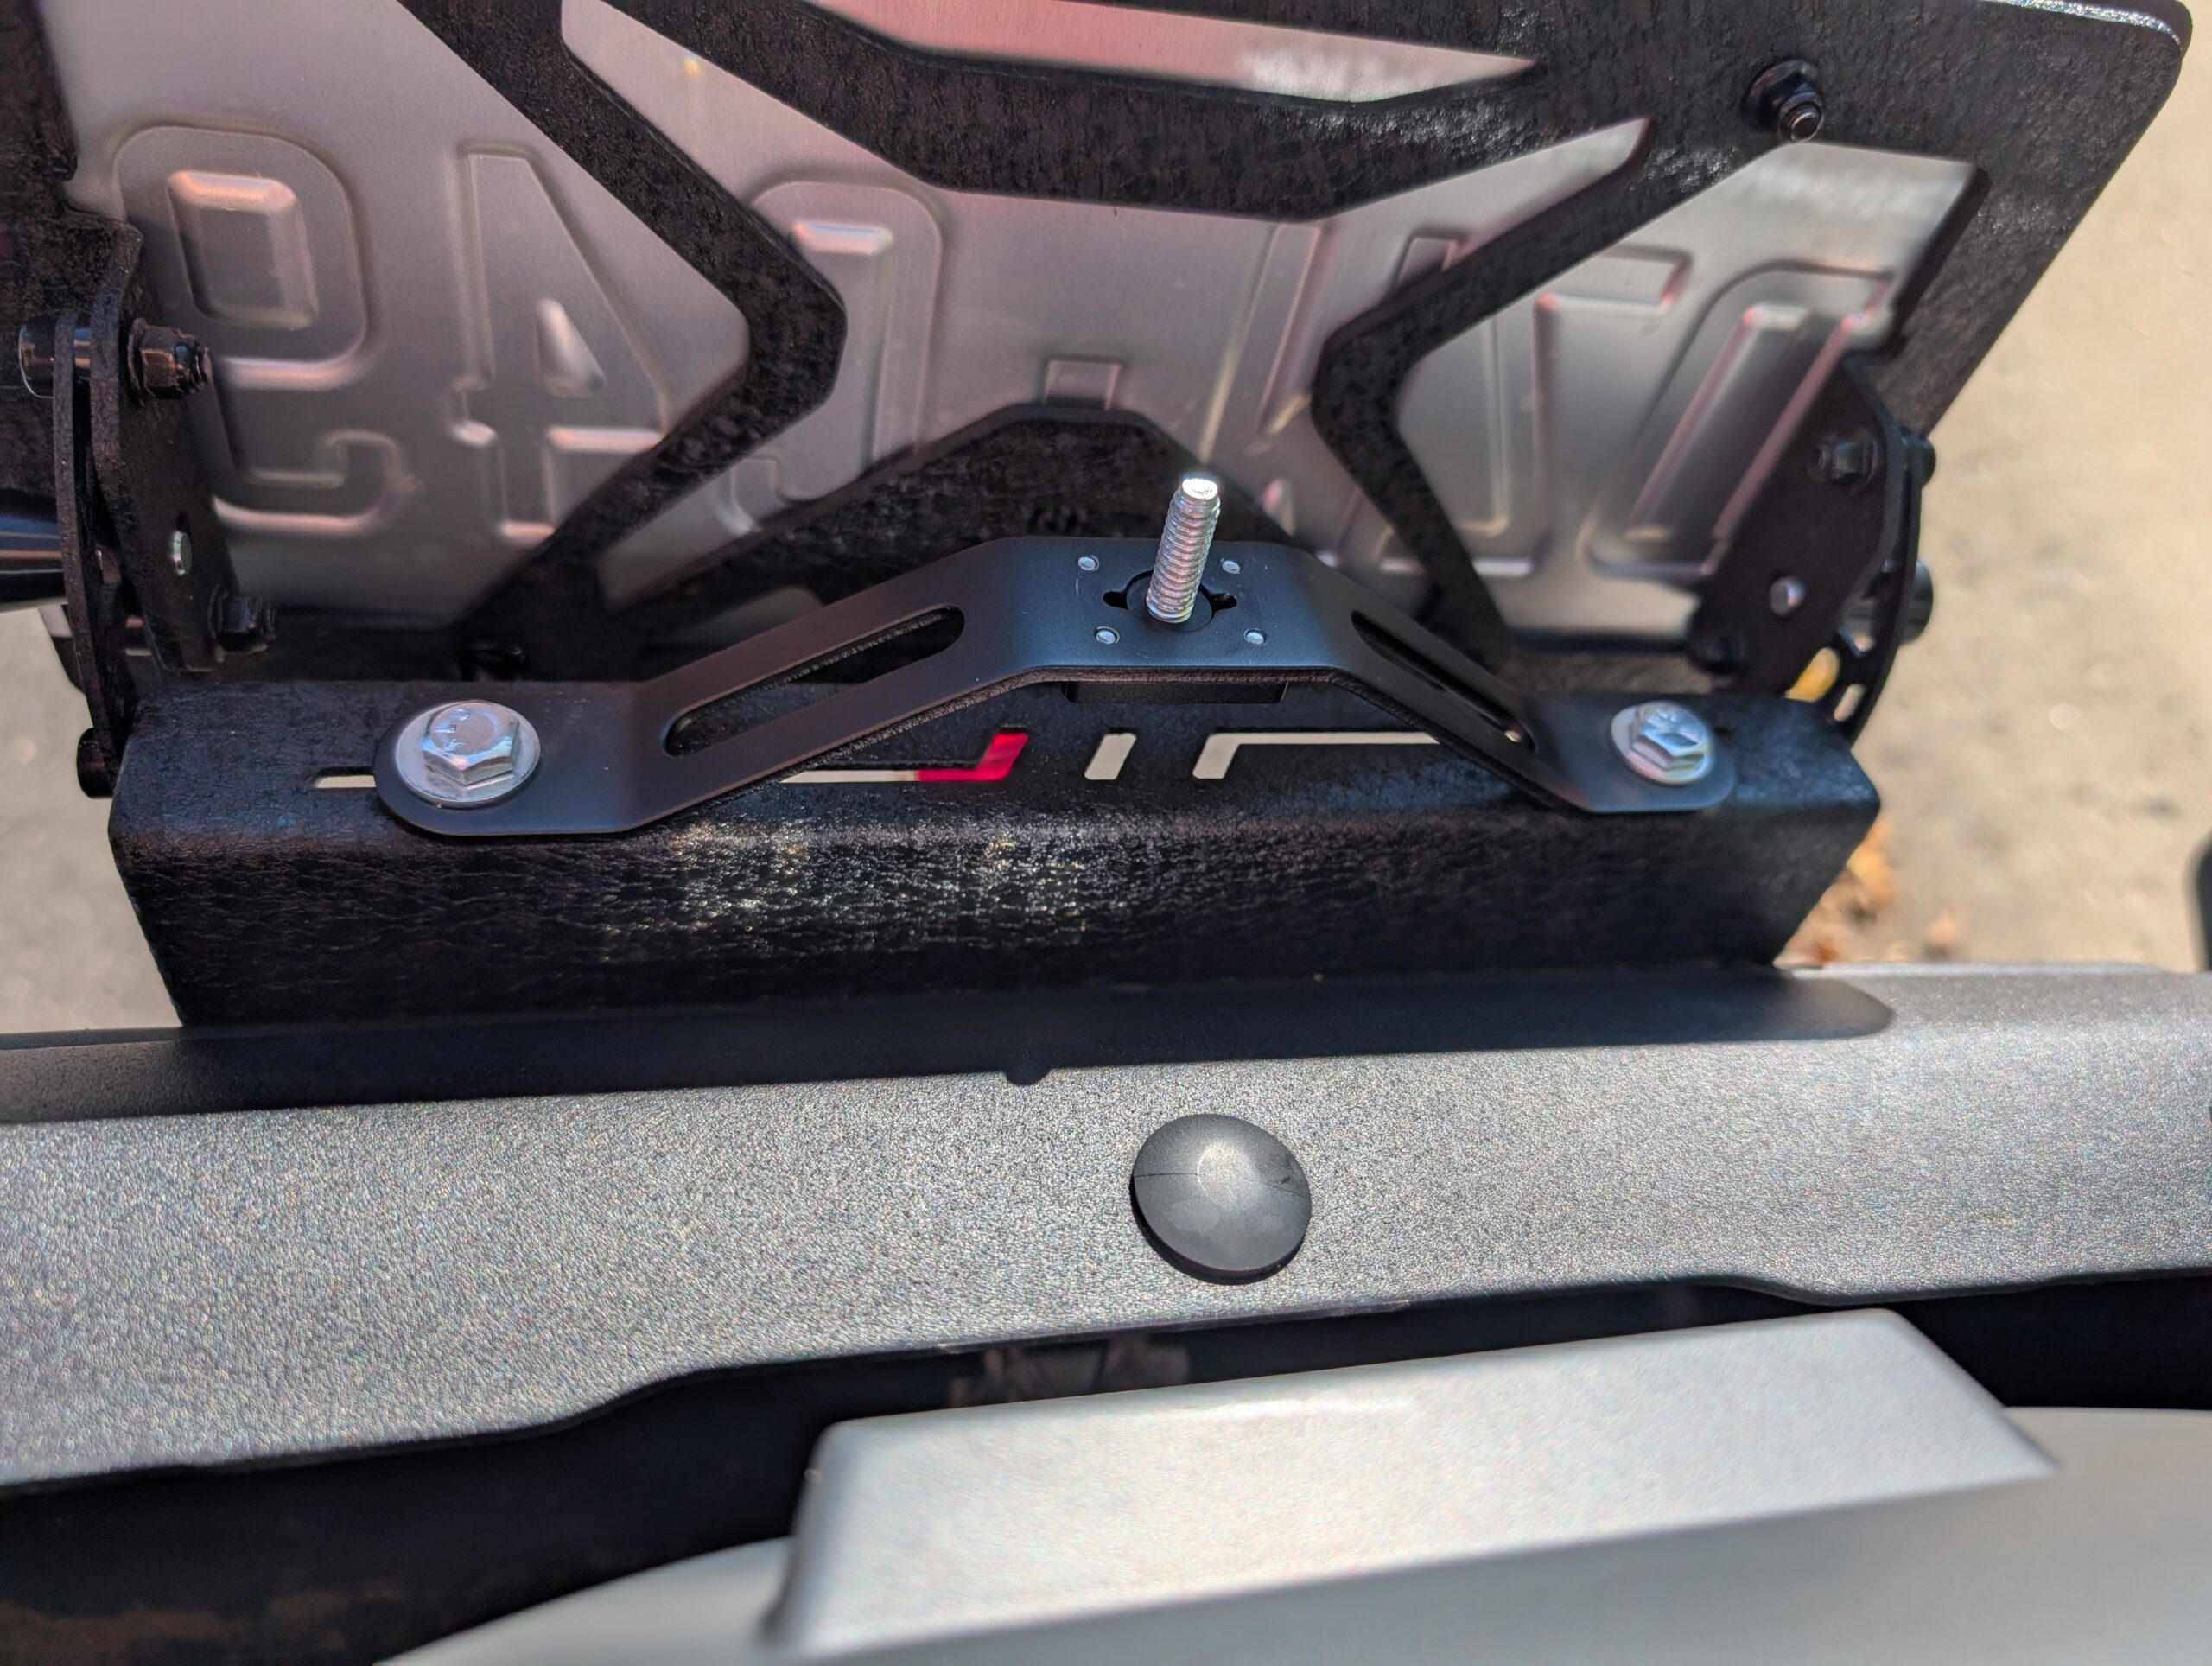
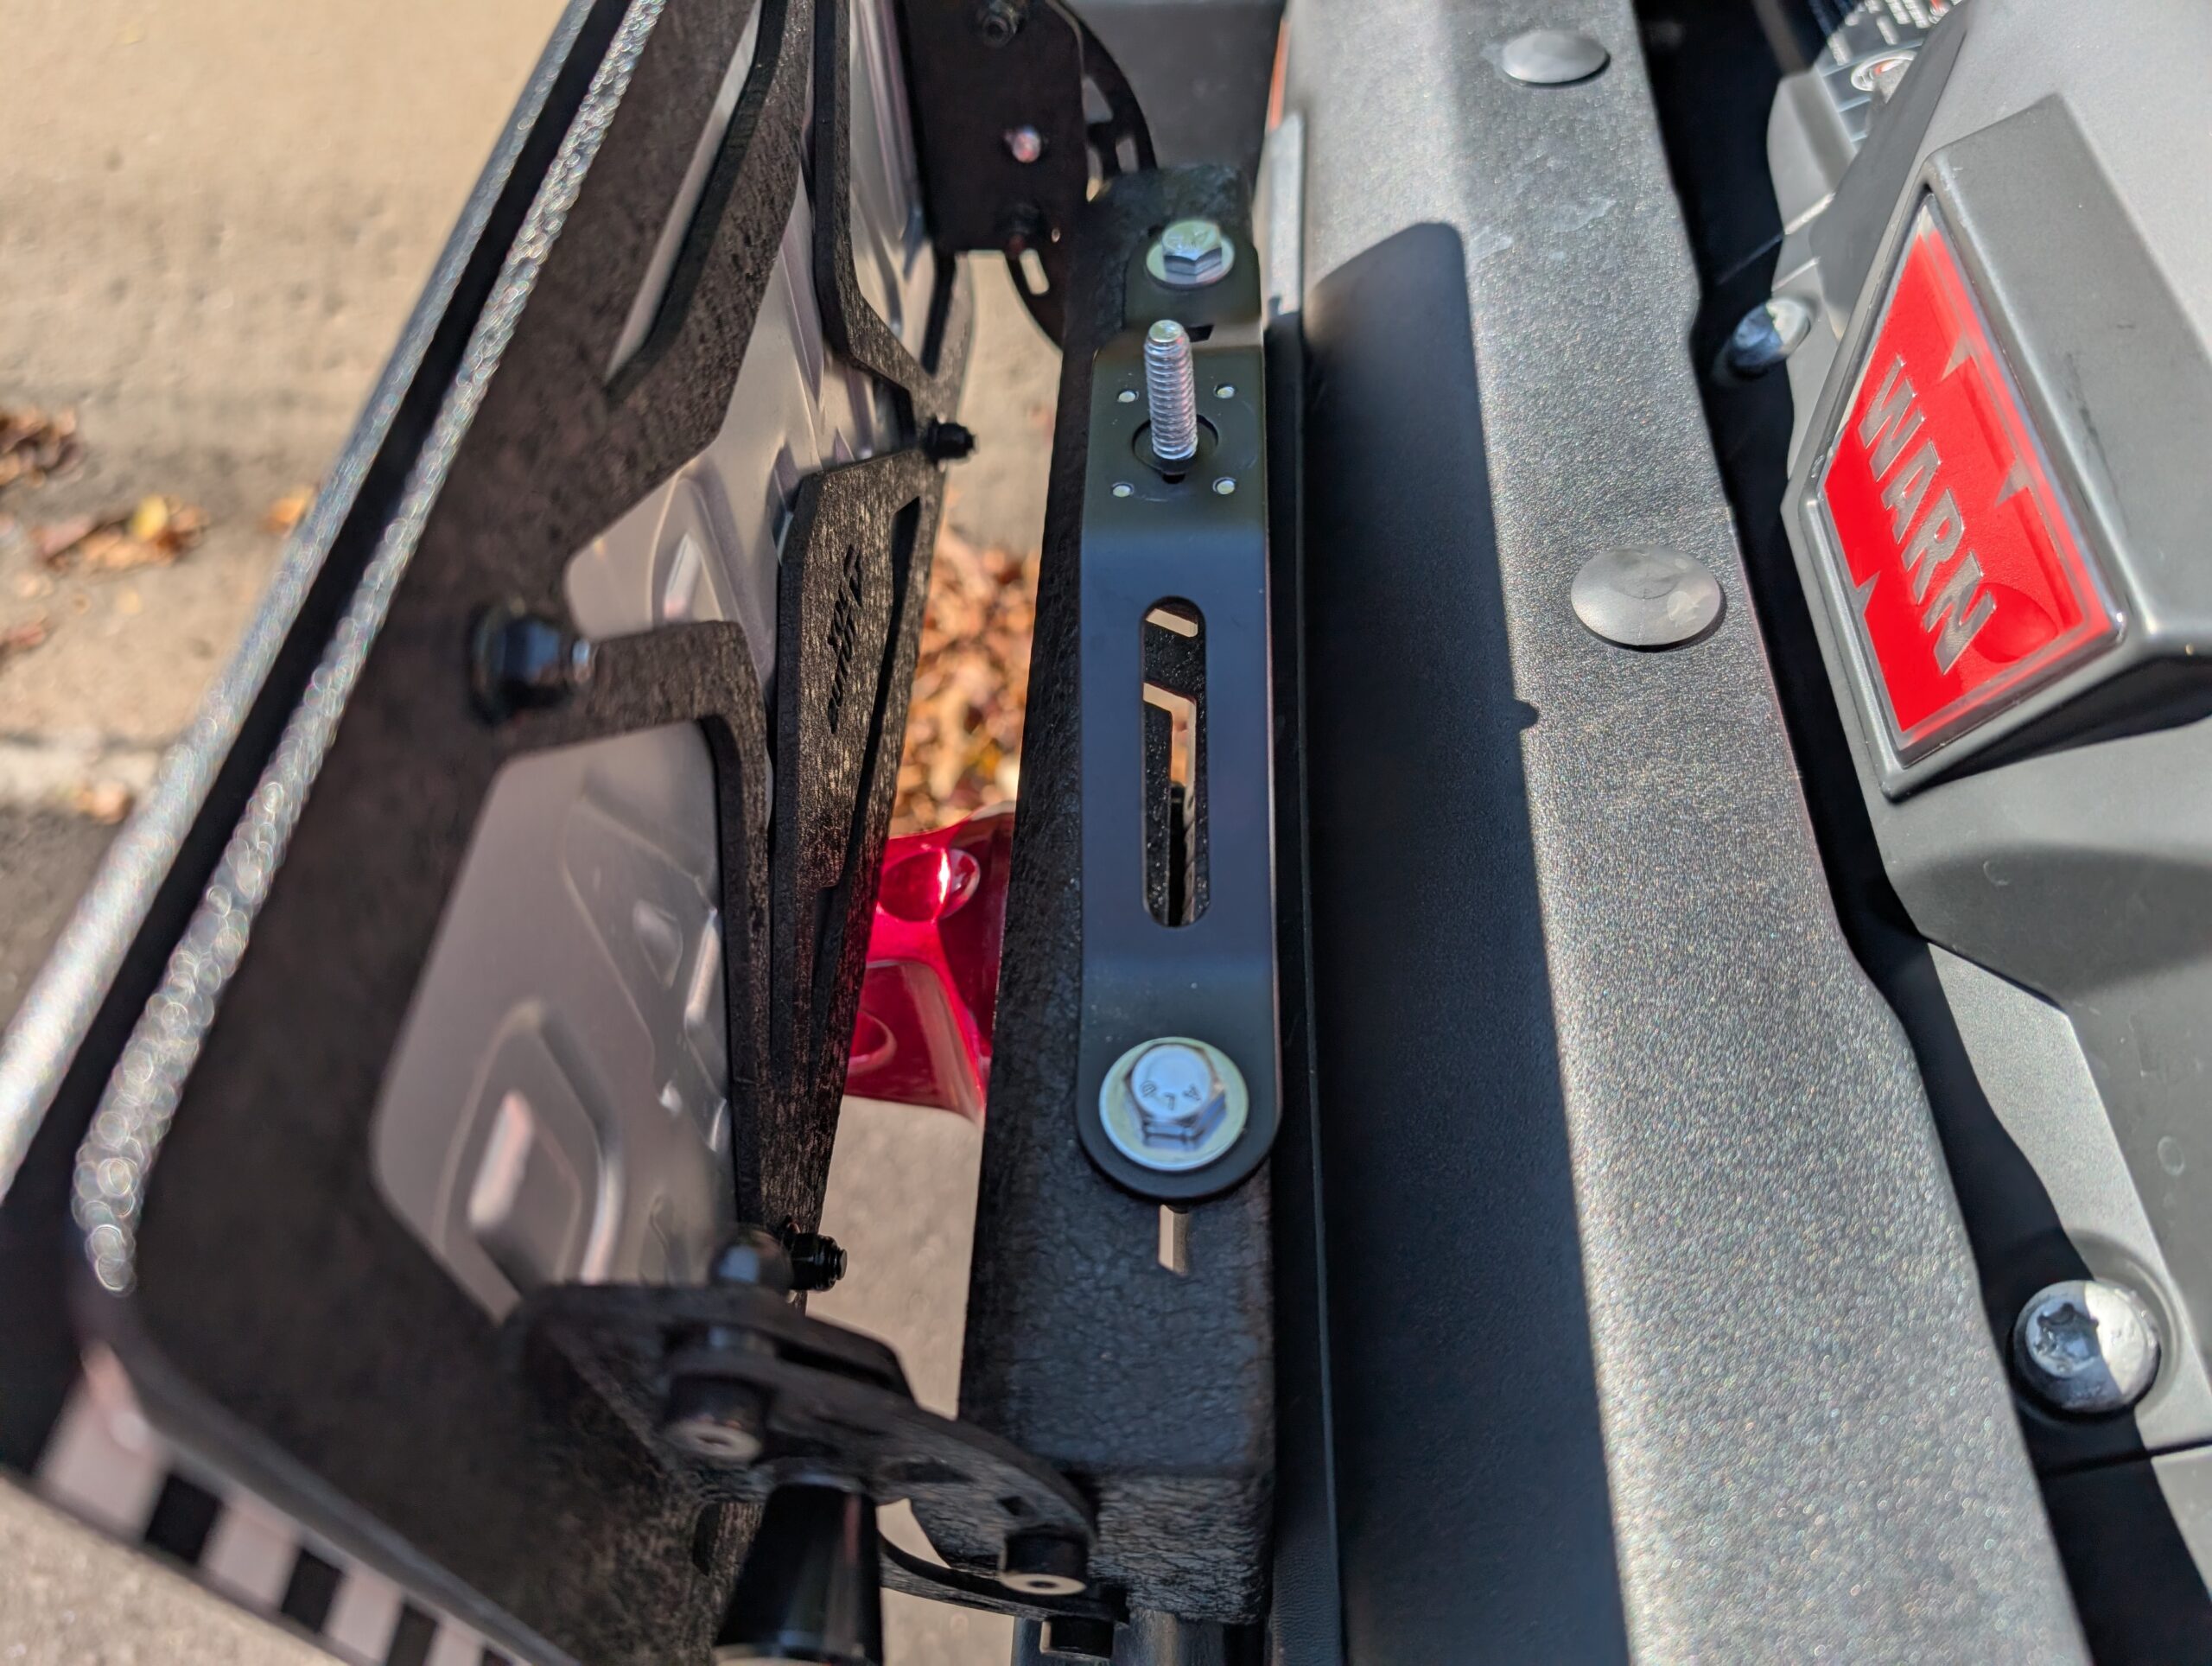
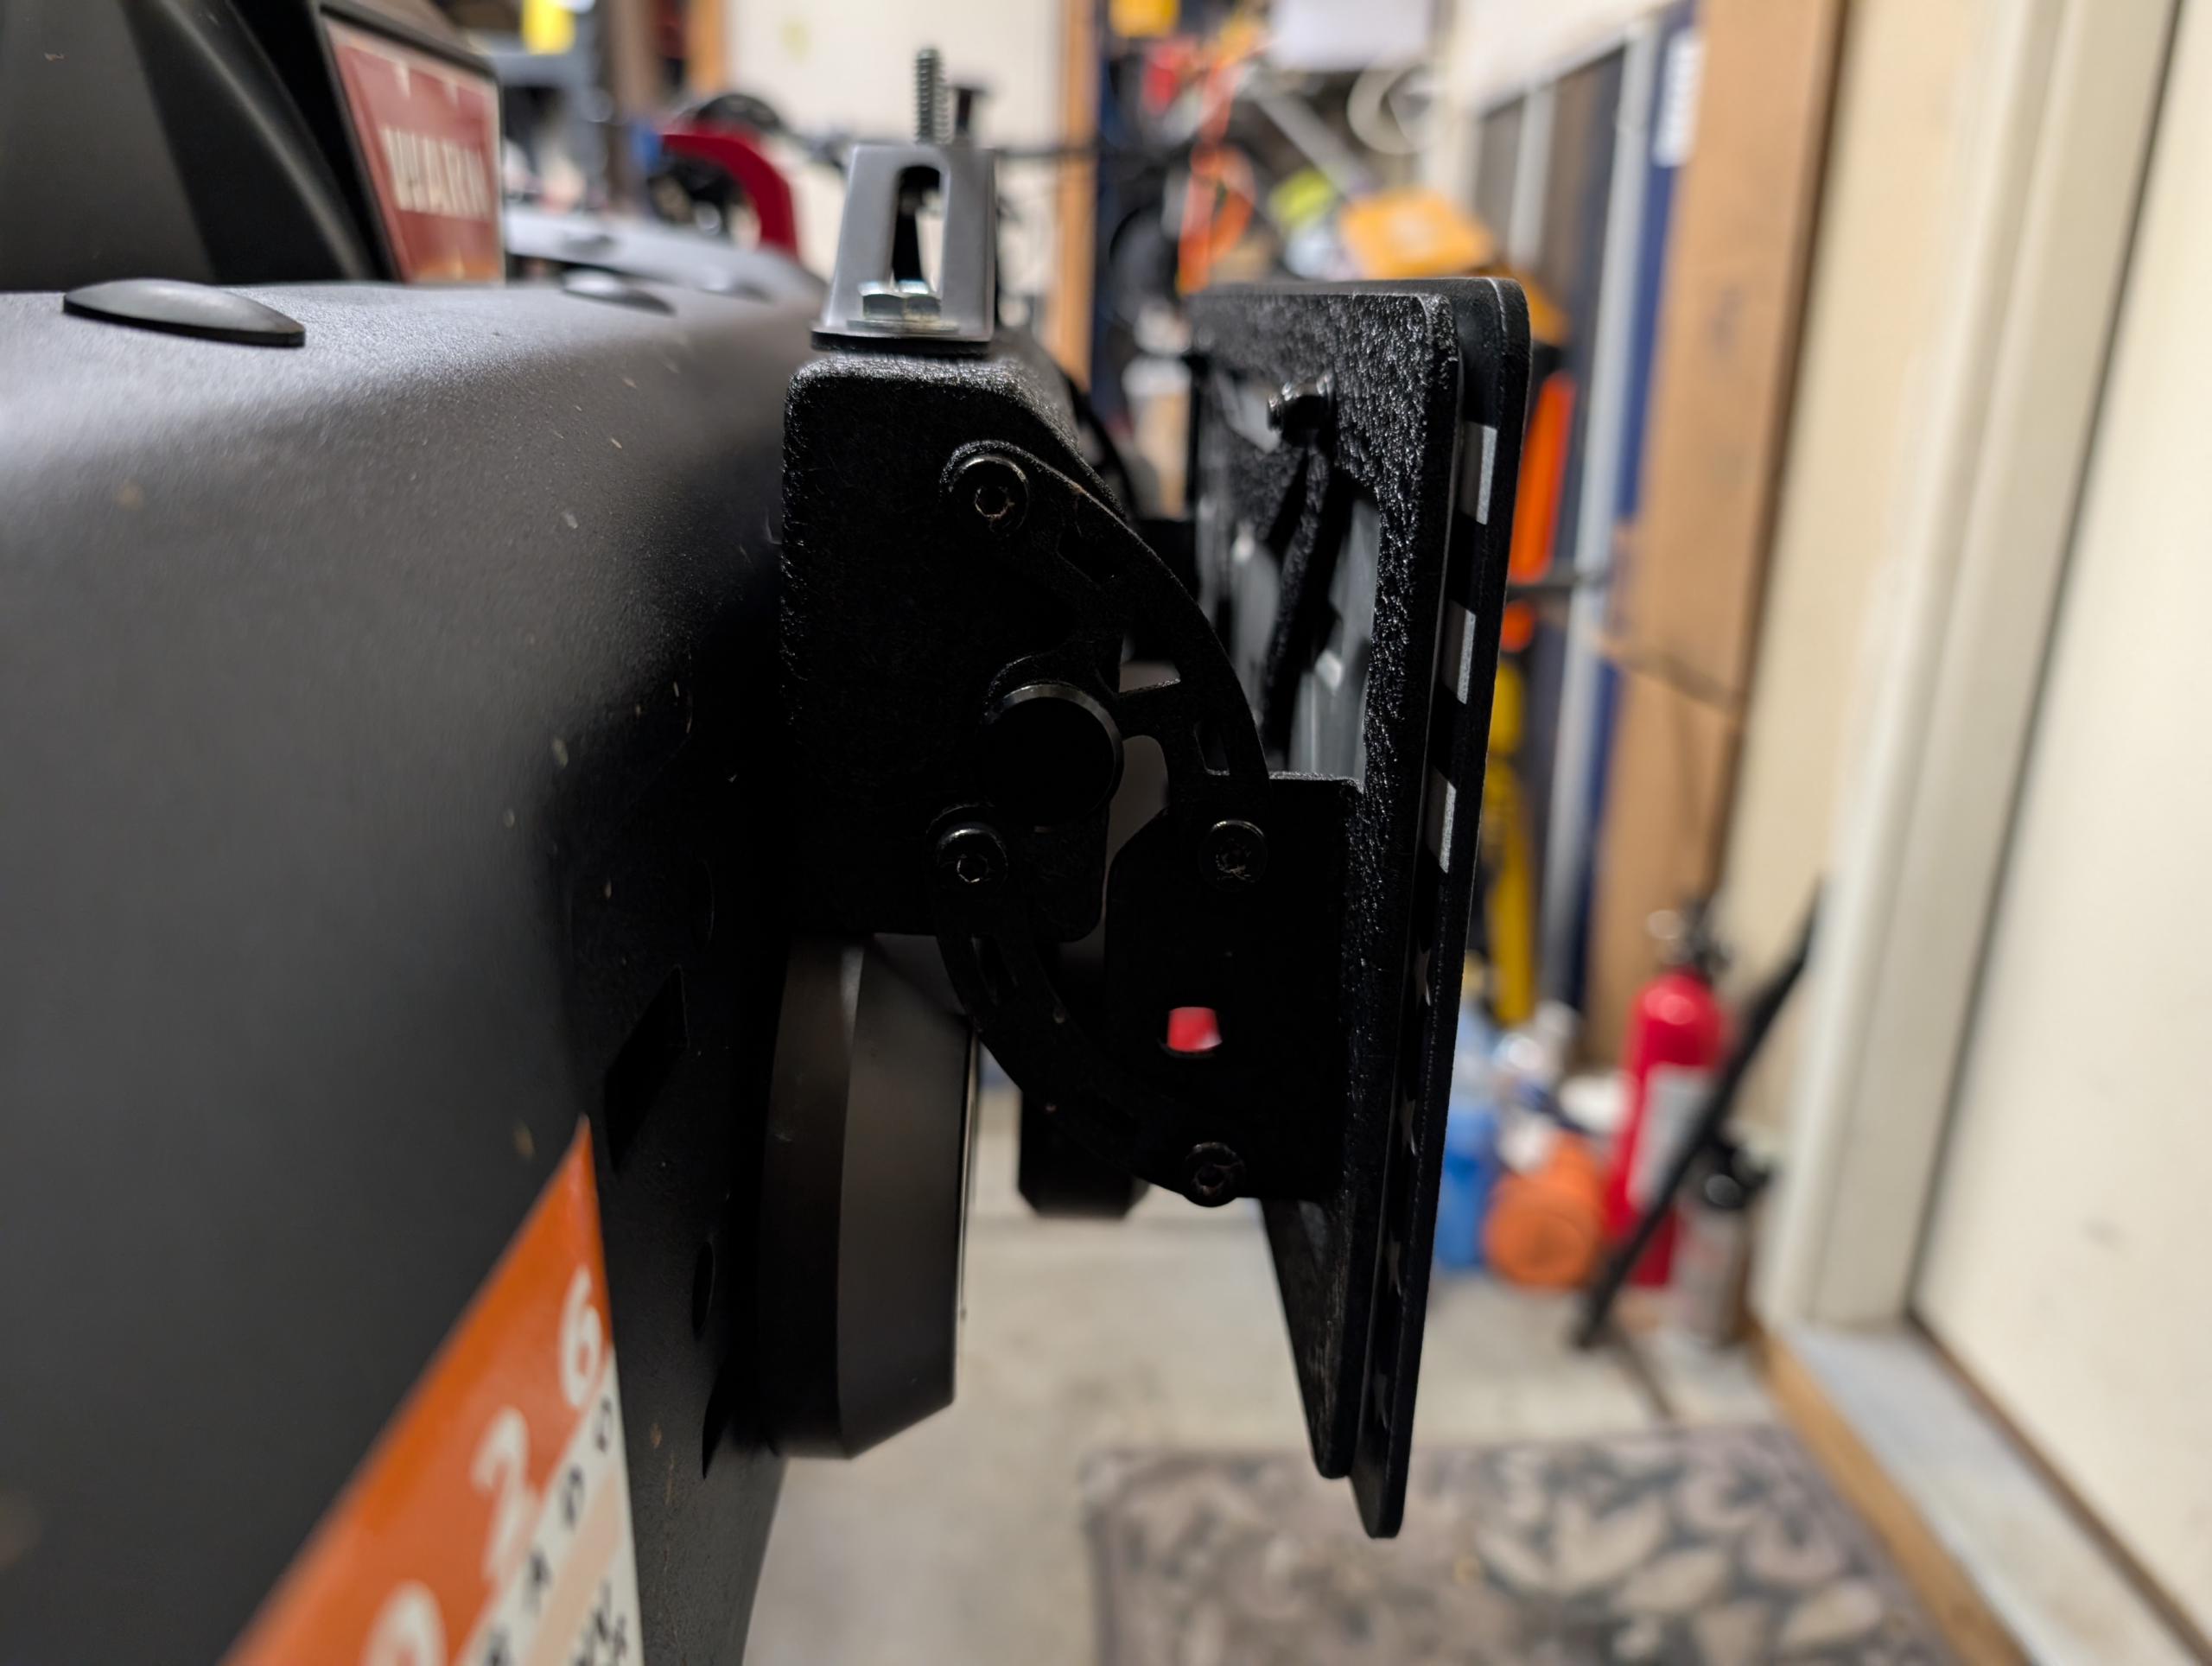
We originally tried the NEEWER Triple Suction Cup Car Mount Kit (Amazon link in the notes). For our use, the suction cups were unreliable—one didn’t work at all—so we repurposed only two pieces from that kit: the aluminum bridge that connects two cups, and the extendable camera post. The post is solid and worth the cost of the overall purchase.
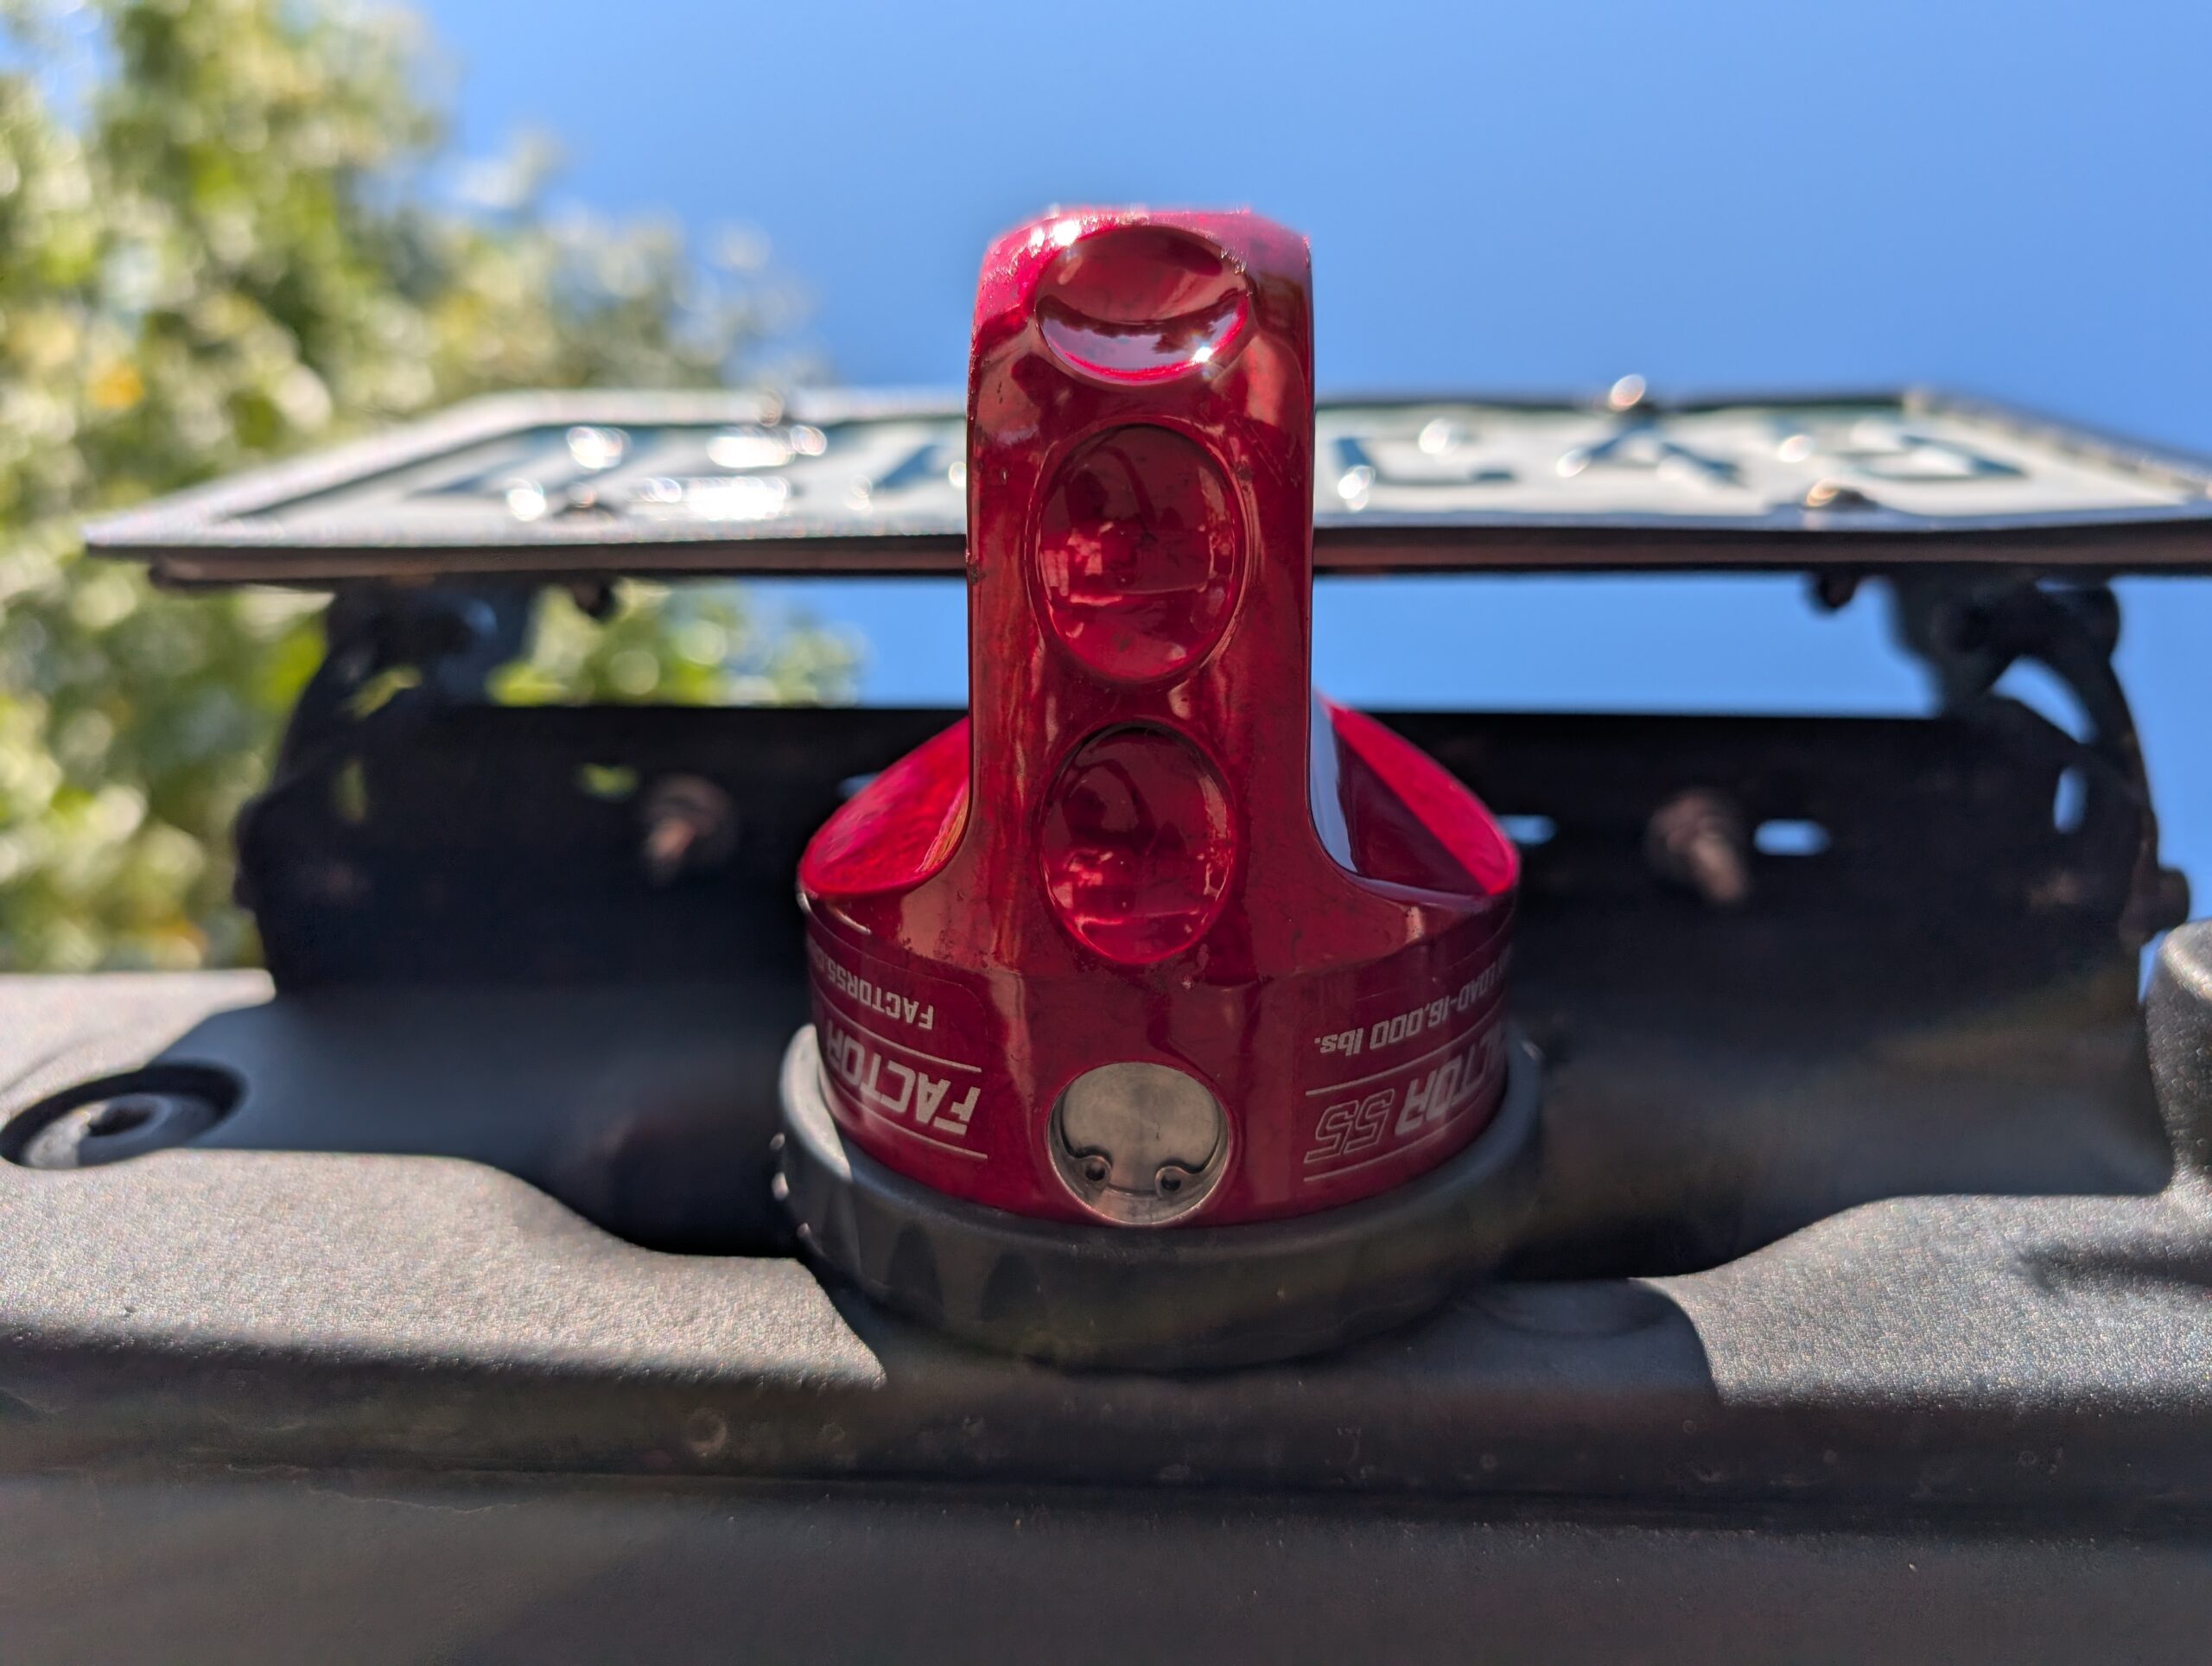
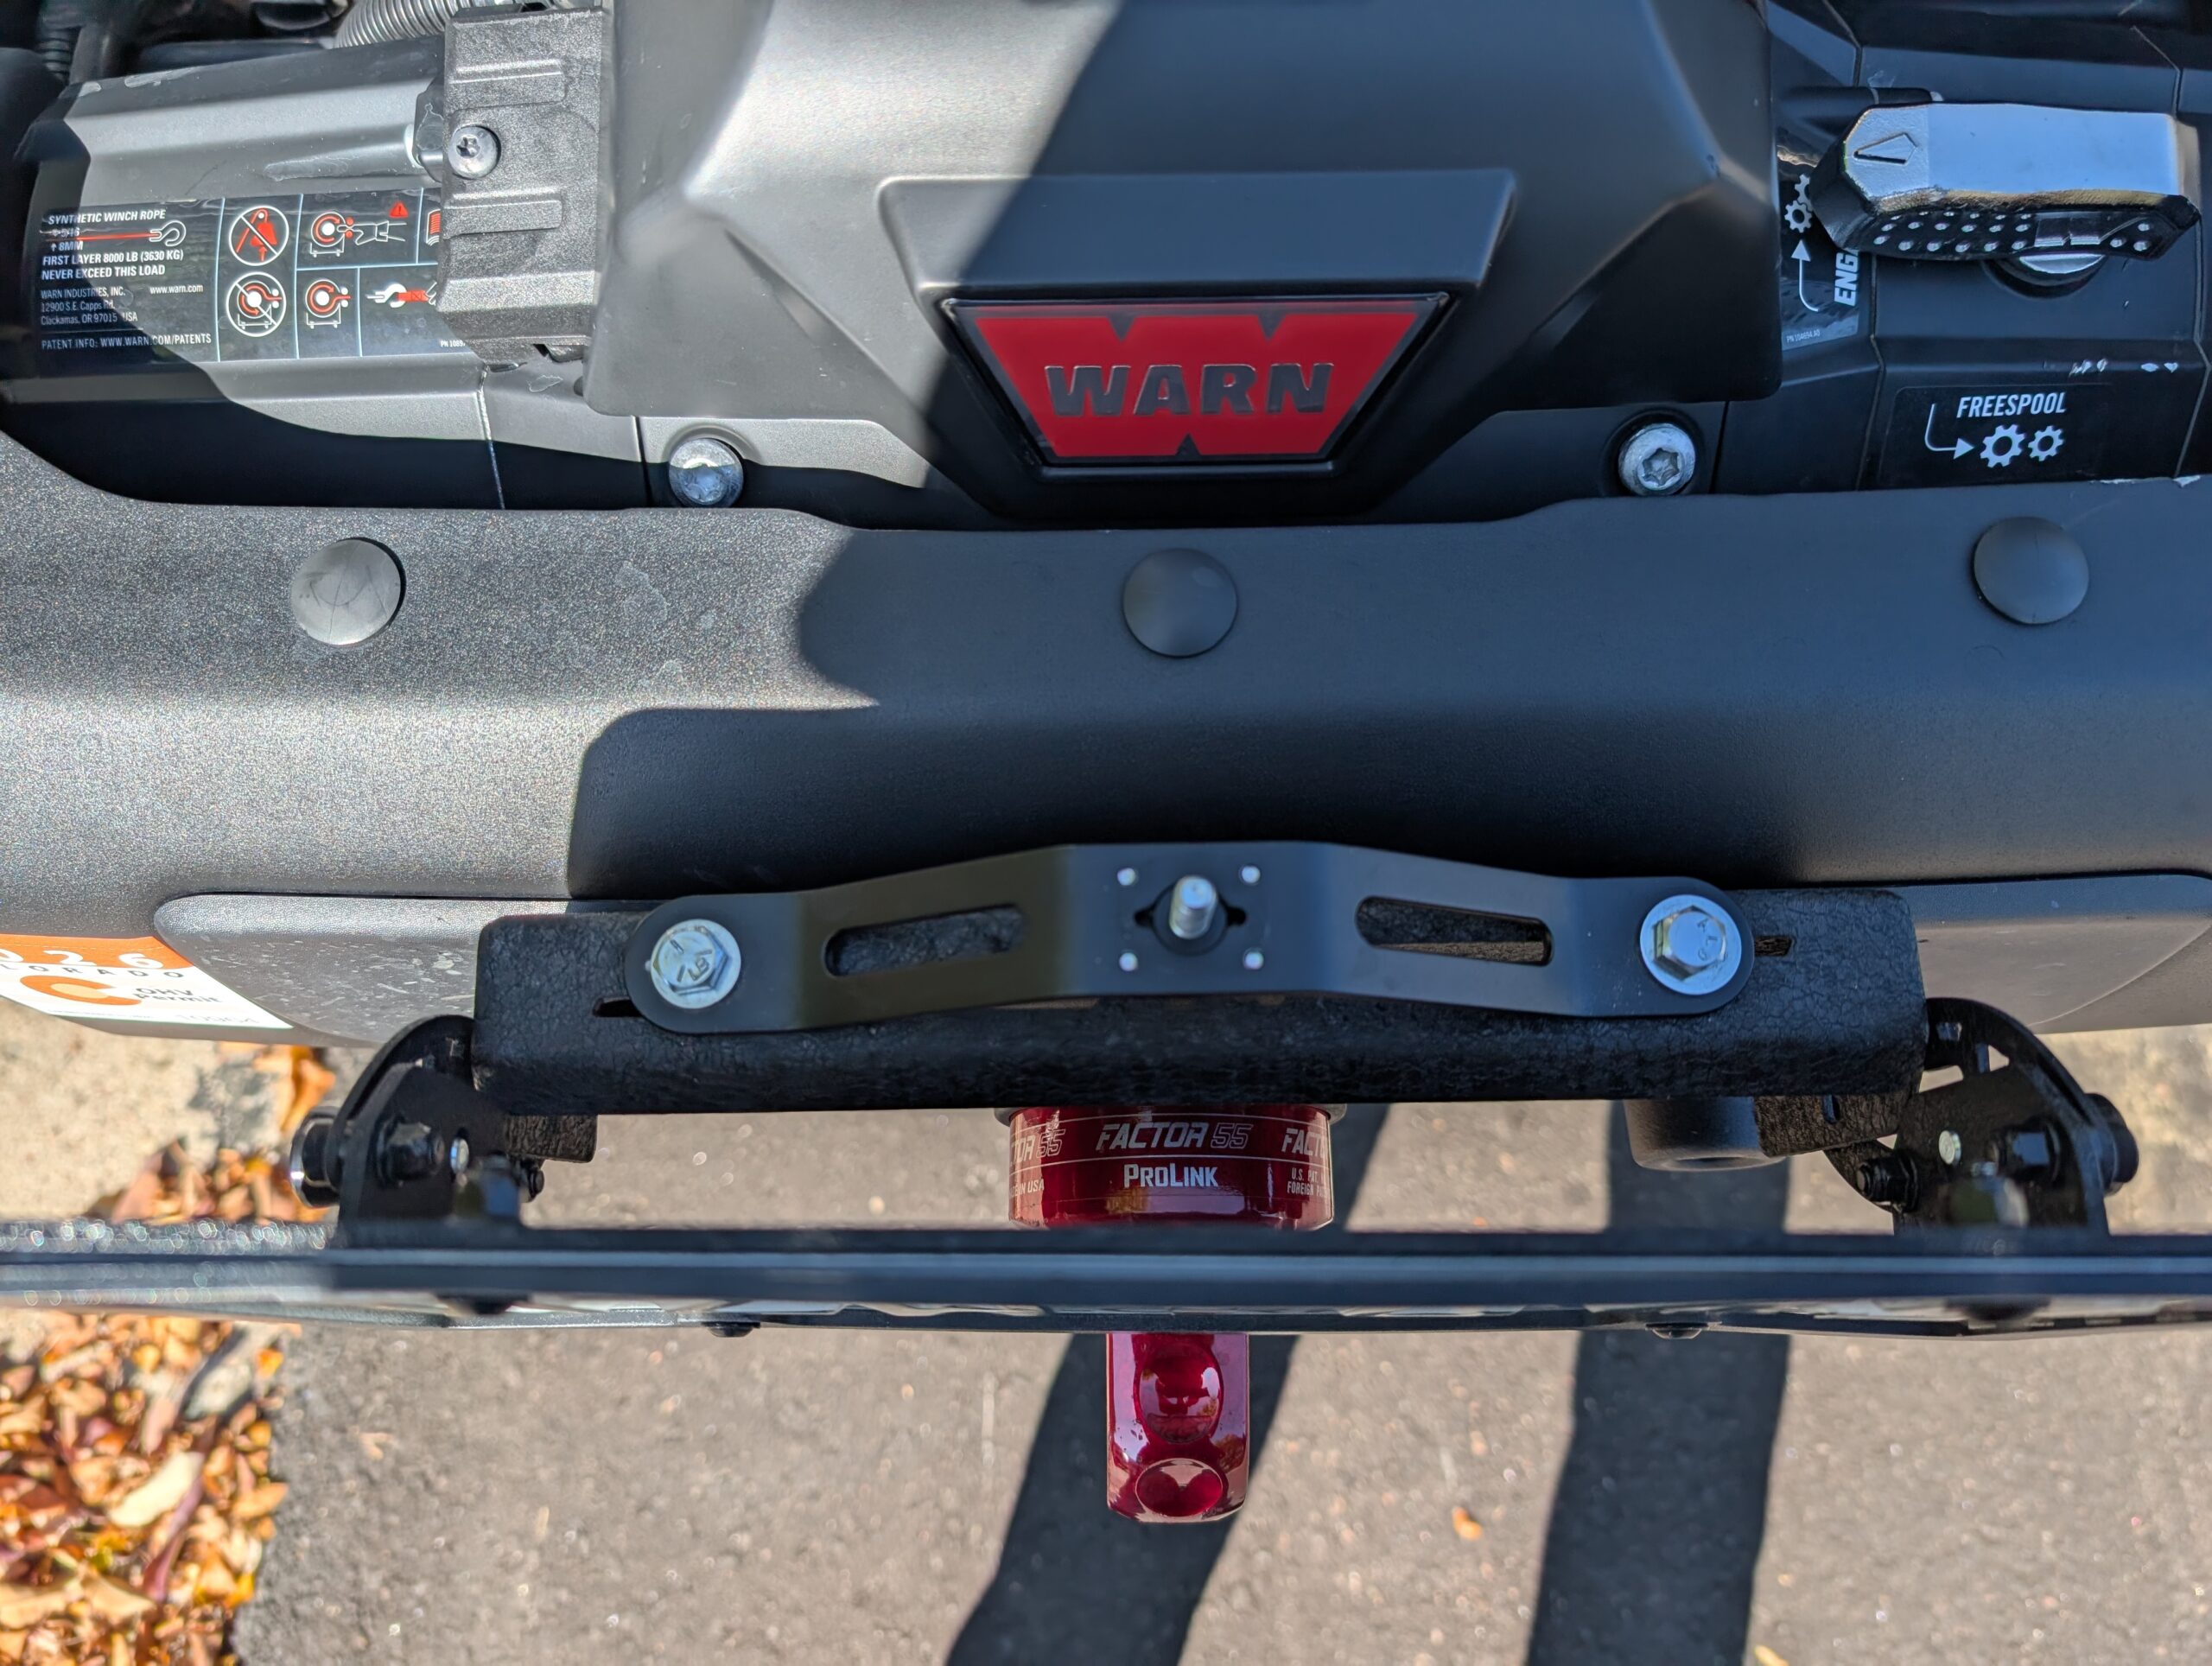
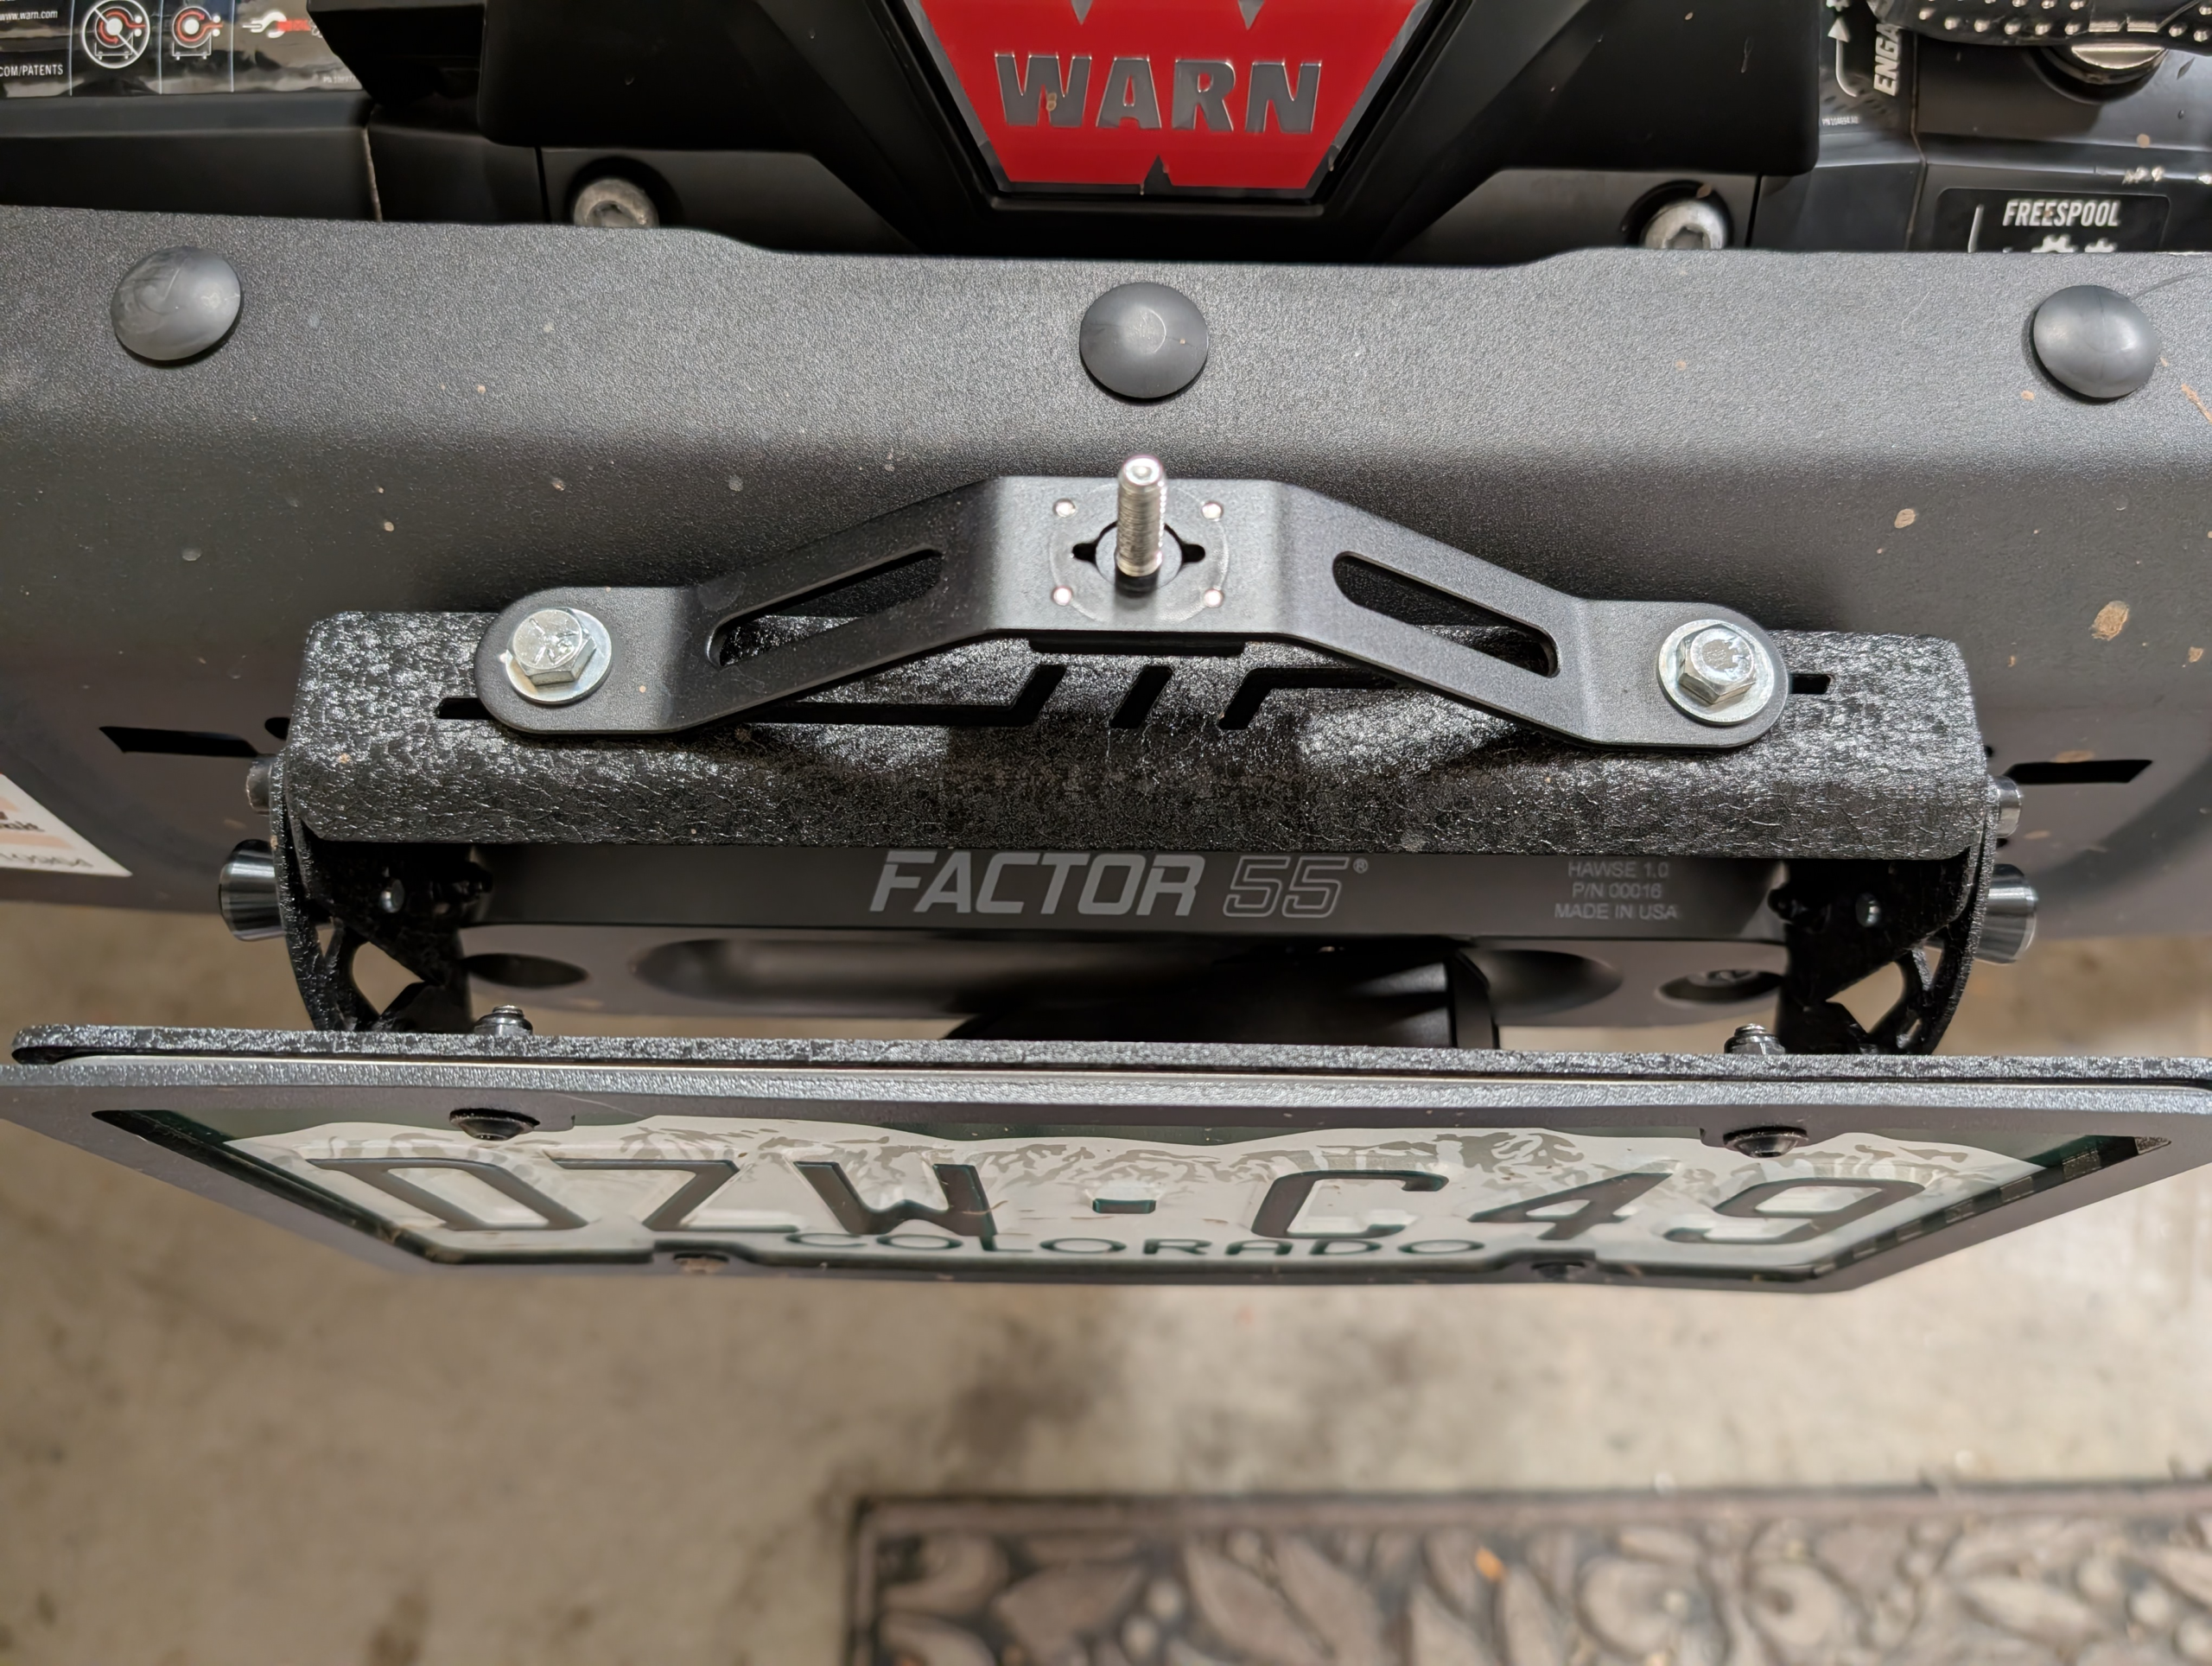
We mounted the bridge to a flip-up license plate holder designed for winch fairleads: the JOYTUTUS Universal Flip-Up License Plate Mount for a 10-inch hawse fairlead (also linked above). Heads-up if you have a JL: it didn’t fit our OEM fairlead on our 2025 Jeep Wrangler, so we replaced the OEM fairlead with an aftermarket Factor55 fairlead.
To attach the bridge, we drilled a couple of holes in the top of the license plate holder and used nuts and bolts from the hardware store. We also added a 1/4-20 camera stud in the center so we can quickly install and remove the extendable post. The whole setup is straightforward and feels sturdy. There’s some shake on rough sections, but the Insta360’s stabilization cleans it up nicely.
Height-wise, the camera sits a bit higher than the roofline. That gives a great look without getting into the trees on most Colorado trails. Once we add roof rack mounts, we will experiment with a higher, more centered mount for open terrain like Moab, where there aren’t many branches to smack the camera.
Editing software
We edit in Insta360 Studio primarily, but we can leverage other video editing software as needed. The basic workflow is simple: drop in the 360 clips, scrub the timeline, and set keyframes wherever you want to change the view. Between those keyframes, the software automatically pans and tilts, so the viewer always sees the most interesting angle. It’s a flexible way to re-frame a single run into multiple views without mounting multiple cameras.
Performance-wise, Insta360 Studio is a resource hog. A fast NVMe drive, plenty of RAM, and a capable GPU make a big difference. On Windows, we explicitly force the app to use the NVIDIA GPU instead of Intel integrated graphics—both in Windows Graphics Settings and the NVIDIA Control Panel. We’ve also noticed that Studio can bog down if left open for a long session, so we’ll close and reopen it as the software starts to become less responsive. We’re hoping that future updates to this software will improve its performance.
If the raw video includes an Air Mic track, Insta360 Studio lets you mix it with the camera’s onboard mic using the Audio Mix/Dual-Track controls. On X5, an external Bluetooth mic such as Mic Air appears as a separate source, and you can balance the two during edit or export.
One nuance: whether the Air Mic is captured doesn’t depend on where you press Record; it depends on whether the mic is connected when recording begins. Mic Air records directly to the camera once the Bluetooth link is active. If you start recording before the mic reconnects—common with Quick Capture or immediately after powering on—the clip will begin with camera audio only and switch to the Air Mic after the link comes up. To avoid gaps, wait for the mic icon/connection indicator on the camera, or start/stop from the Air Mic itself to ensure it has linked first.
When we’re done editing and rendering a final video, we upload to YouTube and embed the YouTube video into a Juszak4x4.com blog post. Sometimes we also share videos on Facebook or relevant forums. We’re still experimenting with what makes the most watchable edit, but the 360 approach is forgiving: it captures everything, and we can re-frame later to tell the story we want.
Background music
Nobody has asked about the background music that we use yet, but we will share a few notes anyway because it’s interesting. The short version is that music rights are complex and often frustrating, and it’s worth understanding what rights you have to the music you use.
We’ve used public-domain music before, but ownership disputes are common and videos can get tagged by YouTube, Facebook, and others because of the tangle of claims. The supply of high-quality public-domain tracks across genres is limited, and tracking them down takes time. In a nutshell, it hasn’t been worth the effort.
You can also purchase rights to high-quality background music, but that isn’t bulletproof either. Typically you’re buying a license that many other people also hold. The original creators, or others with the same license, can still make claims, and your videos may be flagged for potential violations even if you would ultimately prevail in a dispute. This isn’t worth the effort for personal projects.
Many editing tools include “canned” music, but the selection is limited—especially if you create a lot of videos and want each one to have its own feel to avoid repetition fatigue.
Today, there are new options with AI-generated music. This is what we’ve been experimenting with lately. We tried Suno first, but it wasn’t quite what we wanted. The output is high quality, but the service seems aimed at a different creator audience, and its training data reportedly includes non-public-domain music, which creates gray areas around acceptable use for them and their users. We’re not overly concerned, but we’d prefer to avoid ambiguity.
We’re currently using Soundraw. The relatively low monthly cost lets us generate as much background music as we need for videos on YouTube and similar platforms. It’s a quantity-over-quality approach, but after generating enough tracks and tweaking the settings, we can usually find or create music that fits the vibe we’re after. Our process is to log in periodically, generate a batch, and save promising tracks to use in future edits. If you listen closely, you’ll hear a range of styles, though we tend to favor upbeat acoustic pieces with instrumentation that shifts throughout the track.
The main advantage with Soundraw is its permissive license and its use of in-house music to train the generative models. In other words, they’re in a stronger position to claim full rights to the underlying material, which makes extending those rights to customers—us included—clearer than services that derive creativity from copyrighted catalogs.